
What are microgreens?
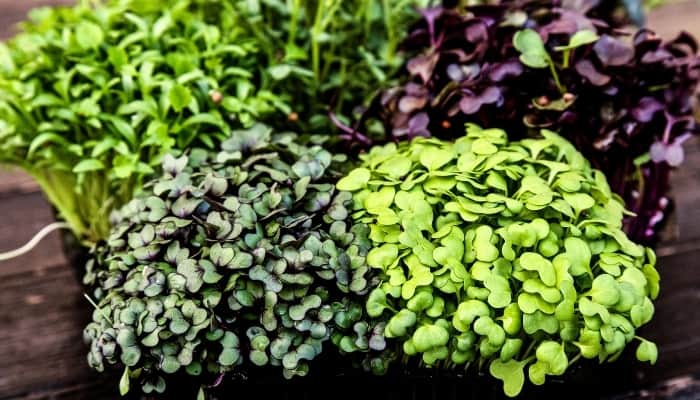
Microgreens are essentially young plants that have just begun growing their first set of leaves and have reached the stage where their cotyledons form. They are essentially immature versions of familiar vegetables and herbs such as broccoli, peas, corn, or basil.
Microgreens are a popular food because of their high nutritional contents, fresh and bright flavors, vivid colors, and crunchy textures.
Unlike other types of farming and gardening, microgreens are incredibly easy to grow. It takes very little equipment or specialized knowledge to successfully grow them.
Are microgreens healthier than vegetables?
Microgreens have significantly higher concentrations of nutrients, minerals, and antioxidants than their adult counterparts. They are more nutrient-dense, so they pack more nutritional punch than regular veggies.
In particular, vitamin C, vitamin E, and carotenoids are all present in much higher levels.
For example, cabbage microgreens have been found to contain almost 40 times the vitamin E and 6 times more vitamin C than fully-grown cabbage.
Some of the most nutritious microgreens are:
- Broccoli
- Peas
- Kale
- Swiss chard
- Amaranth
- Radish
- Wheatgrass
- Arugula
Another reason microgreens are so healthy is that they are often consumed while incredibly fresh.
As soon as a vegetable is harvested, it begins losing nutrients. Studies have shown a 30% loss of nutrients after just three days. Because of this, the spinach you buy at the supermarket has much less nutrition than the spinach you picked from the garden this morning.
Will microgreens regrow after cutting?
A few types of microgreens will regrow after cutting. For example, pea microgreens have a good chance of regrowing post-harvest if you cut them correctly.
The plant needs leaves if it’s going to continue photosynthesizing and growing. Most microgreens only have leaves on the canopy—the ones you harvest and eat. A bare stalk or stem with no leaves won’t regrow!
Peas can regrow because each stalk has small secondary leaves. If you are careful to leave those young leaves alive, you can harvest the top part of the plant and the bottom will continue to grow.

Tray of Pea microgreens ready for harvest.
Another option that works for all microgreens is to harvest normally, and then leave the tray or container under lights and continue watering it. In every tray, some seeds will fail to germinate. These seeds remain in the tray, lying dormant on the surface of the growing medium.
A secondary, post-harvest grow session exposes these seeds to more air circulation and lighting. Give them a good watering, and they may sprout. If you’re lucky, giving a tray a second chance can result in a nice little extra harvest.
Are microgreens healthier than sprouts?
Both microgreens and sprouts are healthy and nutritious, but microgreens contain more nutrients and fiber.
Sprouts grow in water alone and receive no extra nutrients. The nutrients in sprouts all come from what is stored in the seed.
Microgreens, on the other hand, absorb nutrients from the soil, or in the case of hydroponic microgreens, from the fertilizer. These nutrients are absorbed into the plant and spur the synthesis of other nutrients and facilitate vital enzymatic processes. As a result, microgreens have greater nutritional content.
Another thing to consider is that sprouts have a greater risk of harboring dangerous bacteria like E. coli. This is because the conditions required for sprouts to grow, a warm moist environment, is an ideal environment for bacterial growth.
What is the difference between sprouts and microgreens?
Sprouts and microgreens are grown using different techniques and are harvested at different stages of a plant’s life.
Sprouts start as seeds and grow with nothing but water, usually in a jar. After watering, the seeds germinate and are allowed to grow for a short time. They are usually harvested within 4 to 6 days. After harvest, both the seed and the seedling (sprout) are consumed.
Microgreens are usually grown in soil, but can also be grown without soil using hydroponic methods. Seeds are spread across a wide, flat tray where they germinate and then grow under lights. Microgreens are allowed to grow more developed leaves than sprouts. They are cut above the soil level, and only the stem and leaves are consumed.
Can you make money growing microgreens?
Yes, growing microgreens for profit is a legitimate business idea. Many growers have had success making money with microgreens as a small-scale side hustle, small to medium business, even a huge multi-million dollar operation.
Several factors make microgreens a great business idea. First of all, the upfront costs of starting a small microgreens setup are very cheap. The basic items you need to get started are:
- Seeds
- Soil or another growing medium
- Trays
- Lights
All of these items are pretty inexpensive and can be found at any gardening store or online retailer.
Another great money-saving factor is that trays and soil (to an extent) are reusable. The biggest expenses associated with growing microgreens are seeds, labor, soil, and electricity.
Microgreens can be grown in sunlight, but direct midday sunlight should be avoided. Unless you have a greenhouse or plenty of window space, you will want to invest in some grow lights. To keep electricity costs down, I’d recommend using LED lights which are incredibly efficient.
The best thing about growing microgreens for profit is the high value of microgreen yields. If done efficiently, you will have a high-profit margin. Furthermore, there is a strong and growing market for microgreens. Chefs want them, more and more supermarkets carry them, and many customers want to buy them directly from growers.
Growing Microgreens
What are the best microgreens to grow?
In terms of simplicity and flavor, the best microgreens to grow are peas, broccoli, radish, and sunflower. Each of these is tolerant of over and under watering, germinates incredibly well, and tastes great. Also, none of the seeds are particularly expensive.
The only trick with peas and sunflowers seeds is to soak them before sowing them.
Some of the best microgreens to grow that are just a touch more difficult to grow are amaranth, chives (and other micro herbs), carrots, basil, beets, and chard.
These are all delicious, nutritious, and fun to grow. Their only challenge comes from the slightly uneven germination that can occur if temperature, moisture, and other conditions aren’t just right.
Can you use regular seeds for microgreens?
You can use regular seeds for microgreens, but you should always make sure the seeds you use are non-GMO and untreated. Regular seeds are often treated with fungicides and chemicals to help protect them and help them grow. If you use these treated seeds for microgreens you will inevitably consume those chemicals.
Seeds labeled “microgreens” are never treated with chemicals and are non-GMO. Also, microgreen seeds are selected differently than regular seeds, giving them much higher germination rates.
While it may seem like a good idea to save a few bucks and buy cheap regular seeds, you will end up with lower germination rates and potentially harmful compounds on your food.
What supplies do you need to grow microgreens?
At the most basic level, all you need to grow microgreens is seeds, trays, and soil.
Most growers go with 10×20 trays (trays with holes, and trays without holes) because they are cheap and give a nice wide yet shallow space for growth that doesn’t block airflow.
Trays should be filled with high-quality, preferably organic seed starting mix (I’ve had great success with this mix). This mix can include compost, coconut coir, peat moss, perlite, vermiculite, or some combination of these media. Good microgreen soil should be somewhat airy with good drainage.
Seeds specifically for microgreen growing should be purchased from a reputable supplier (these are my go-to seed suppliers) and sown evenly atop the soil.
A spray bottle is useful for getting gentle, even moisture on your seeds and leaves. Ideally, the water inside that bottle should be pH-balanced, which will require a simple pH kit.
Depending on the scale of your grow operation and space you have available, you will likely need growing lights to provide your plants with sufficient light. LED lights are cheap, efficient, and effective.
These are the LED lights I’m currently using:

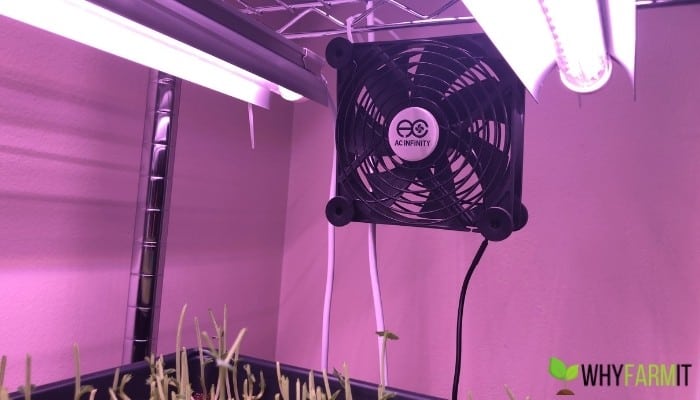
You can buy a small fan or two to add circulation to the grow space, preventing mold and fungus. Depending on your setup, small growing rack fans, which are almost like fans you’d find in your computer, will suffice.
These are the fans I’m using and love them.
They’re super quiet and have 3 speed settings.
Lastly, you’ll want to have a quality pair of scissors handy to harvest your microgreens when they are ready.
How do you prevent mold from growing on microgreens?
The best way to prevent mold and fungus from growing on microgreens is by providing air circulation to your growing space.
Mold and fungus-like stagnant moist air and surfaces. By adding a fan to the growing space, either one that blows directly on the growing tray or one somewhere in the room for some ambient circulation, you can cut down the likelihood that mold or fungus will ruin your yields.
Other causes of mold besides poor circulation are insufficient drainage of water through the growing medium and a lack of lighting. Too much moisture and low light create a dank environment that fungus and mold love.
What is the best temperature to grow microgreens?
The best ambient temperature for most microgreens is between 65° and 75° F (18° to 24° C).
Germination temperatures should be a bit higher, between 68° and 86° F (20° to 30° C).
Temperatures below these ranges tend to hurt seeds’ chances of germinating and can cause damage to foliage. Temperatures above this range can attract diseases.
In general, the higher you can get the temperature and lighting—without damaging foliage—the faster growth will be. Keep in mind though, some plants like brassicas (broccoli, kale, spinach) prefer slightly lower temperatures. Also, more lighting means you will need to increase the watering frequency.
Each seed and seedling has an optimum temperature, but as long as you stay within these guidelines, your microgreens will have a high chance of success.
Can you grow microgreens on a mat?
You can grow microgreen seeds on a mat without using any soil. There are many types of mats made for microgreen propagation, such as hemp, burlap, and synthetic mats.
Because these pads don’t have any nutrients in them like soil does, to get the best results, you should use fertilizer. Using this method, growing on mats becomes a form of hydroponics.
Once your seeds have germinated on the mats using plain water, you can begin to spray the foliage and bottom water the tray with a nutrient solution, which is hydroponic fertilizer mixed with water.
Growing on mats can be a bit tricky because you need to get the right balance of moisture, nutrition, aeration, and lighting, but once you get the hang of it, the yields will be just as good as ones from soil trays.
The benefits of growing on a mat instead of soil are that you won’t make a mess when prepping trays or after you’re finished with them, you don’t need to lug around and handle large bags of dirt, and some growing pads are less expensive than potting soil.