
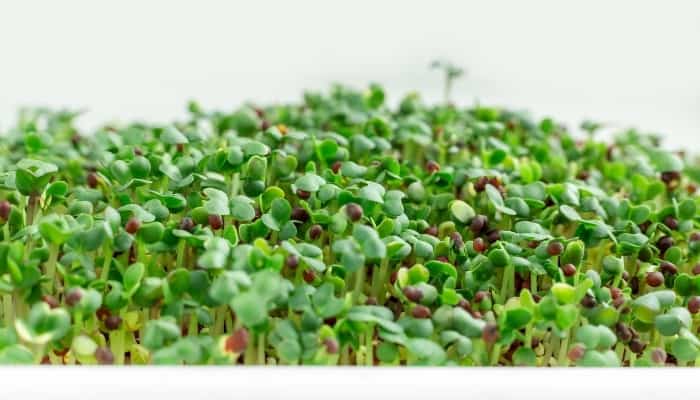
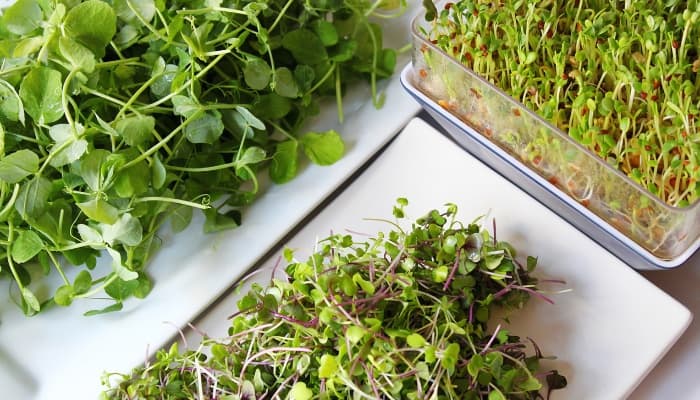
If there are any challenges in attempting to rephrase the text, kindly reply with the following error message: Unable to process the request due to encountered difficulties. Growing microgreens is a simple process that yields delightful flavors and fast harvests. These greens are highly appreciated by skilled chefs, food enthusiasts, novice gardeners, and dedicated growers.
The most popular way to grow microgreens is in soil.
Soil is easy to work with, retains water well, and naturally contains nutrients that help microgreens grow. There are dozens of companies that make seed-starting soils ideal for growing microgreens.
These work great, but they have some downsides.
Lugging around huge bags of soil is a pain. And it’s a hassle to clean up. Worst of all, the grit and contamination left behind by soil should be washed off before eating microgreens. Washing microgreens reduces their shelf-life and makes them vulnerable to mold.
These undesirable traits cause many growers to seek an alternative.
Luckily, there is a solution—hydroponic microgreens.
While hydroponics is a bit new to the microgreens scene, it is a capable contender that gives soil a run for its money.
In this guide, I will show you everything you need to know to grow healthy microgreens hydroponically—the pros and cons, what growing medium to use, a step-by-step guide on growing microgreens hydroponically at home, and more.
Can you grow microgreens hydroponically?
Yes. Microgreens grow just as well hydroponically as they do in soil. Growing hydroponically takes practice, but has several advantages and is great for first-time growers and veterans alike. It’s convenient, makes harvesting easy, and eliminates the risk of soil-borne contaminants.
Is it better to grow microgreens in soil or water?
Despite what you may hear from growers on each side of the fence, there is no “better” way to grow microgreens. Microgreens grow incredibly well hydroponically and in soil. Each method has its pros and cons.
No matter where you grow them, your microgreens will have more or less the same color, yield, flavor, and nutritional value.
Whether you choose soil or soil-free depends on your personal needs and limitations.
In short, hydroponic microgreens offer greater convenience but can be trickier to get right. Let me explain…
What are the pros and cons of growing microgreens hydroponically?
Microgreens grown in soil almost always have some soil on them post-harvest. This soil will either end up ruining someone’s meal with an unpleasant grittiness and dirt flavor or even make them sick.
And washing the plants may not sound like a big deal, but fungus and mold are a big issue for microgreens. Wet microgreens are very susceptible to mold.
Mold can creep up in a matter of hours. Even if done carefully, washing will inevitably reduce the shelflife of microgreens.
With hydroponic microgreens, you don’t need to harvest as carefully, as you run zero risk of contaminating your plants with dirt. And post-harvest, you don’t need to wash them.
On a similar note, using soil can be messy, especially for indoor growers. By using a soilless growing medium (like what is used in hydroponics) you can skip the hassle and cleanup.
Compared to soil, hydroponic mediums are easier to ship, handle, fill trays with, and dispose of post-harvest.
On the flip side, hydroponics does have a downside.
Compared to soil, it can be more difficult to optimize.
For experienced growers, yields of microgreens grown in soil and hydroponic systems are comparable. You do not need to sacrifice yield weight with hydroponics.
But for beginner growers, it can take a few tries to get things right. You will likely need to tweak your seeding, watering, nutrition, and lighting a few times before hydro-yields get up to par with soil ones.
Because soil growing is less complicated and the plant’s nutrition is built right into the medium, it’s harder to mess up.
Hydroponics, on the other hand, requires you to add the right balance of nutrients.
Also, not every plant type or variety is suited for hydroponics. Some do extremely well without soil, and others just do alright. More on the best microgreens for hydroponics below.
Looking for the best microgreen seeds? True Leaf Market is hands-down my favorite place to buy microgreen seeds. Check out their full selection here.
What is the best hydroponics system for microgreens?
The best system to grow fresh microgreens hydroponically depends on various factors such as space availability, budget, skill level, and personal preferences.
Here are a few hydroponic systems that work well for growing microgreens:
- Nutrient Film Technique (NFT): This system involves a shallow, sloped channel where a thin film of nutrient solution continuously flows over the roots of the plants. NFT is efficient for growing microgreens due to its high oxygen exposure and minimal water usage. It’s best for small-scale production.
- Aeroponics: Aeroponic systems mist the roots of plants with a nutrient solution suspended in the air. This method provides ample oxygen and nutrient access to the plants, promoting rapid growth. While typically used for larger plants, it can also be adapted for microgreens.
- Vertical Tower Systems: These systems are great for maximizing space as they grow plants vertically in stacked layers. Some tower systems use hydroponics to deliver water and nutrients directly to the plants. These can work well for microgreens as long as they provide sufficient light and proper spacing.
- Wick System: The wick system is a simple, passive hydroponic method where a wick draws nutrient solution from a reservoir to the plant roots. It’s relatively low-cost and easy to set up, making it suitable for beginners growing microgreens.
- Kratky Method (Deep Water Culture): This is a passive hydroponic system where plant roots are suspended in a nutrient solution with no air or water pump. The roots absorb nutrients as the solution level decreases. It’s easy to set up and suitable for small-scale microgreen production.
- Drip System: Drip systems deliver a controlled amount of nutrient solution to each plant through a network of tubes and emitters. This method is adjustable and can work well for microgreens, but proper spacing and control are crucial.
- Ebb and Flow (Flood and Drain): In this system, the growing tray is periodically flooded with nutrient-rich solution and then drained. It’s efficient and versatile, accommodating various types of plants, including microgreens.
- Microgreen Trays: These specially designed containers are well-suited for growing microgreens. They come in various materials, sizes, and configurations to cater to the unique requirements of these small, fast-growing plants.
- Countertop Microgreen Kits: Countertop kits are designed to make hydroponic microgreen growing accessible and convenient, especially for those with limited space or those who want a hassle-free setup. These kits usually come with everything you need, including trays, growing medium, nutrients, and sometimes even seeds.
What is the best growing medium for hydroponic microgreens?
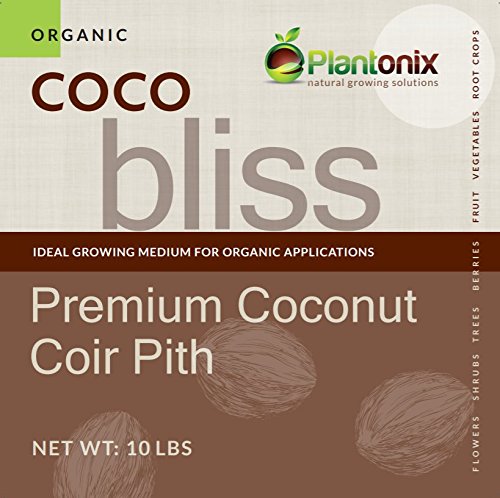
The best and most popular growing media for hydroponic microgreens are BioStrate, hemp mats, jute mats (burlap), coconut coir, and vermiculite.
BioStrate Felt is a proprietary growing medium made by Grow-Tech. This is a flat, soilless pad made of biopolymers and natural fibers, specially designed for hydroponics. It holds water well and gives roots plenty of space to grow.
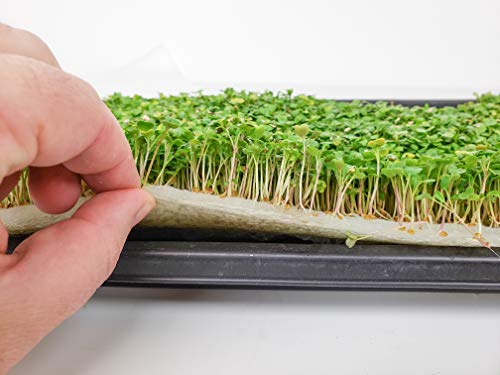
Hemp mats are another pad-type growing medium. These are made of 100% natural hemp fibers. These also have great absorption properties and give a good structure from which your microgreens can grow. Hemp mats are biodegradable and compostable.
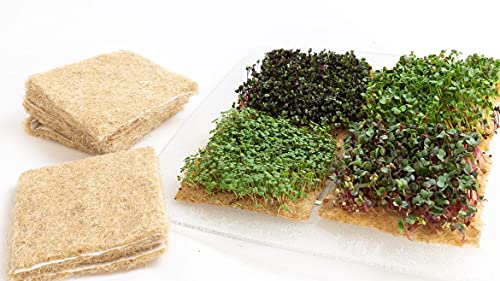
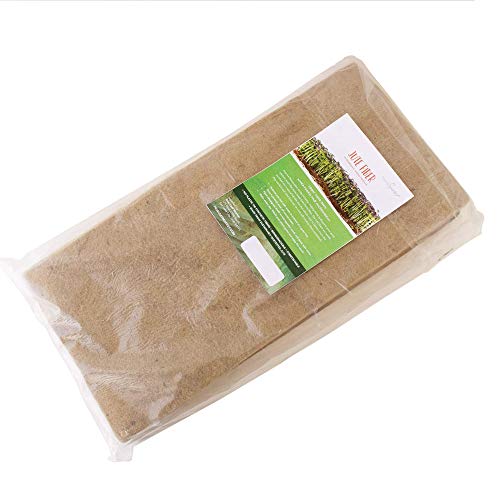
Jute pads are yet another growing mat. Also known as burlap, Jute fiber is sustainable and cheap but unfortunately doesn’t hold as much water as the other pads.
Coconut coir may look like soil, but it is totally soil-free. Made from a byproduct of coconut production, coco coir has impressive absorption, aeration, and drainage properties. This is an organic and sustainable growing medium. The only downside is that it can be messy to work with.
Vermiculite is made when a naturally occurring mineral is heated until it expands. The resulting product is vermiculite, an incredibly absorbent growing medium. These tiny pebbles are versatile and popular, being used in potting soils, hydroponics, seed starting, and more.

Each of these is a great growing medium in its own right. The difference mostly comes down to price and whether you prefer a pad-type medium or a loose product.
Do hydroponic microgreens need fertilizer?
Hydroponic microgreens don’t need fertilizer, but in general, they do better with it.
This is because hydroponic growing media don’t contain any nutrients. By adding nutrients to the water, microgreens will grow taller and fuller and be healthier.
Having said that, you can certainly throw some seeds into your tray onto a piece of Biostrate, hemp mat, or coco coir, add nothing but pure water and watch an impressive crop of veggies sprout up. This is by far the easiest and cheapest way to grow microgreens.
However, to increase your yields and get more consistency in your system, nutrients should be added to the water.
Some of the best nutrients to use for hydroponic microgreens are MaxiGro, FloraGro, Liquid Kelp, and OceanSolution.
These are high-quality fertilizers that contain the essential nutrients that help microgreens grow. They are also incredibly easy to use. Here is how to prepare them:
- MaxiGro – Mix 1-2 teaspoons of MaxiGro with 1 gallon of pure water.
- FloraGro – Mix 3 teaspoons of FloraGro with 1 gallon of pure water.
- Liquid Kelp – Mix 1-2 ounces with 1 gallon of pure water.
- OceanSolution – Mix 1 ounce with 1 gallon of pure water.
After diluting and mixing the fertilizer, you can use it to water your microgreens or as a spray to moisten growing media and seeds.
In general, seeds are germinated with pure water. Only after the seeds have sprouted and the tray goes under lights do you need to use fertilizer. The kick of nutrients at this stage helps to get boost height, thickness, and cotyledon size.
What microgreens grow best hydroponically?
Most types and varieties of microgreens can do well in a hydroponic system. However, some do better than others.
For the best success rates and yield sizes, try growing wheatgrass, broccoli, amaranth, cabbage, clover, kohlrabi, kale, mustard, radish, pea, sunflower, and mixed microgreens.
Check below to see a full guide on how to grow broccoli microgreens hydroponically.
The Basics of Growing Hydroponic Microgreens
Getting started with hydroponic microgreens is surprisingly simple. If you have previously grown microgreens in soil, you probably already have most of the equipment and expertise you’ll need.
To grow hydroponic microgreens, you will need:
- pH kit
- Trays with holes
- Trays with no holes
- Growing medium (BioStrate)
- Seeds (Purple Sprouting Broccoli)
- Hydroponic fertilizer (OceanSolution)
- Spray bottle
- LED grow lights
- Scissors
- (Optional) Digital scale
Step 1: Take one of the trays with holes and place it inside a tray with no holes. The top tray will hold the growing medium and seeds and the bottom one will be used to hold water after the seeds germinate.
Step 2: Balance the pH of the water you will be using. Use your pH tester to test the water and then use pH-Up or pH-Down solution (all included in the kid) to bring the water as close to 6 as possible.
Step 3: Soak your BioStrate growing pad in plain water until it is completely saturated. Let it drip for a few seconds before placing it into the top tray (the one with holes).
Step 4: Measure 30g of Purple Sprouting Broccoli seeds (or another microgreen seed of your liking) and sprinkle them evenly across the growing pad. If you don’t have a scale, you can use about 2 tablespoons of seeds. These seeds do not need to be pre-soaked.
Step 5: Give the seeds a few sprays of pH-balance water, just enough to get them all coated.
Step 6: Now, take another holeless tray, flip it upside down, and place it on top of your growing tray. We do this just to cover the seeds and keep them out of the light. Microgreen seeds need a dark, moist environment to germinate. Place your covered tray somewhere safe. It’s best to keep it away from extreme temperatures.
Step 7: Water your seeds twice a day for the next few days by lightly spraying them with plain water until the seeds and growing pad look moist. You can gently lift the tray with the seeds in it and check the bottom for roots. Once you see roots poking through the holes, you can begin to water the bottom tray as well as the sprouts and pad. Just spray some plain water into the bottom tray until there is a very thin layer. Re-cover after each watering.
Step 8: By the fourth day of watering and darkness, your seeds should have germinated and should be looking great. Now we can remove the cover tray, place the tray under grow lights, and begin bottom-watering.
Step 9: Mix one ounce of OceanSolution fertilizer with one gallon of pH-balanced water. Then take a half cup of that diluted solution and pour it into the bottom tray. Place the tray, uncovered, under grow lights (if you don’t have any grow lights, you can use a very sunny windowsill).
Step 10: Continue bottom-watering like this with the fertilizer solution twice a day for another seven days.
Step 11: On the seventh day, the microgreens should be ready to harvest! Use scissors to cut the microgreens free. Hold the canopy of the microgreens and cut as close to the pad as possible.
If you’re looking to dip your toe in the water and try growing microgreens hydroponically, I highly recommend checking out this starter kit. It has everything you need to get going including (3) complete grow tray sets, (10) grow mats, pH test strips, (6) varities of seeds, AND step-by-step instructions. Check it out here.

How To Harvest Microgreen Seedlings
Harvesting microgreens is a simple process, but it’s important to do it correctly to ensure you get the best flavor, texture, and yield from your crop. Here’s a step-by-step guide on how to harvest microgreens:
- It’s time to harvest hydroponic microgreens when their first true leaves have emerged. This usually occurs after the cotyledon leaves have emerged and the plants are still young and tender.
- Prepare clean and sanitized scissors or garden shears for harvesting. Sanitizing your tools helps prevent the spread of disease.
- Hold the base of the microgreen shoots gently between your fingers, just above the growing medium or substrate. Use the scissors or shears to make a clean cut. Avoid pulling or tugging as this can damage the root system.
- Cut the microgreens just above the growing medium, leaving a small portion of the stems attached. You want to avoid cutting too close to the roots, but you also don’t want to leave any portion of the cotyledon leaves.
- If you’re growing multiple trays of hydroponic microgreens, harvest them in batches as they reach the appropriate size. This way, you can have a continuous supply of fresh microgreens.
- Store the hydroponic microgreens in an airtight container or plastic bag lined with a paper towel to absorb excess moisture. Place the container or bag in the refrigerator. Hydroponically grown microgreens can have a slightly longer shelf life compared to soil-grown microgreens due to the absence of soil-borne contaminants.
- Incorporate your freshly harvested hydroponic microgreens into your meals for added flavor, texture, and nutrition.
Your wonderful harvest of microgreens is ready to eat and doesn’t need to be washed. You can harvest the whole thing and store it in an airtight bag in the fridge.
Alternatively, you can begin harvesting as much as you need bit by bit when they’re ready, keeping the rest of the tray alive. This way, your product will last longer.
You can have a fresh microgreen salad each day for a week or more. Just be sure to keep the tray under light and continue watering it with plain water to keep the plants fresh and prevent wilting.
If you want to wash the microgreens, you can harvest the entire tray and store it, unwashed, in an airtight bag with a paper towel or two inside of it (to absorb moisture and prevent mold). When you are ready to eat, take out the amount you desire and wash it right before eating.
Microgreens stored unwashed this way will keep fresh in the fridge for at least a week if not more.
Potential Issues With Microgreens in a Hydroponic System
When growing microgreens hydroponically, there are several potential issues that you might encounter. Being aware of these issues and knowing how to address them can help you maintain a successful and healthy crop.
Here are some common problems to watch out for when growing hydroponic microgreens:
- Damping-Off Disease: This fungal disease can affect young seedlings, causing them to wilt and die. To prevent damping-off, maintain proper ventilation, avoid overwatering, use clean trays and equipment, and ensure good drainage.
- Algae Growth: Algae can thrive in the presence of excess moisture and light. Algae growth can compete with microgreens for nutrients and affect their growth. Maintain appropriate moisture levels, avoid excessive light exposure to the nutrient solution, and provide proper ventilation to prevent algae growth.
- Nutrient Imbalances: Incorrect nutrient concentrations or imbalances can lead to poor growth, discoloration, or deficiencies in microgreens. Regularly monitor and adjust the nutrient solution according to the needs of the specific microgreens you’re growing.
- pH Fluctuations: pH levels that are too high or too low can impact nutrient availability and affect microgreens’ growth. Monitor the pH of the nutrient solution and adjust it as needed to keep it within the optimal range for your microgreens.
- Root Rot: Overwatering or poor drainage can lead to root rot, where the roots become infected by pathogens. Ensure proper drainage, avoid waterlogged conditions, and use sanitized growing mediums to prevent root rot.
- Insects and Pests: Some pests, like aphids, fungus gnats, and thrips, can infest hydroponic systems and damage microgreens. Regularly inspect your growing area, maintain cleanliness, and consider using natural pest control methods if necessary.
- Temperature and Humidity Extremes: Inconsistent temperature or humidity levels can stress microgreens and lead to slower growth or disease. Maintain stable environmental conditions within the recommended ranges for your specific microgreens.
- Overcrowding: Planting microgreens too densely can lead to poor air circulation, increased moisture retention, and greater competition for nutrients. Follow recommended seed density guidelines to ensure proper spacing.
- Poor Germination: Inconsistent or low germination rates can lead to uneven growth and reduced yield. Ensure that seeds are evenly distributed and well-covered in the growing medium. Maintain appropriate moisture levels and temperatures for germination.
- Insufficient Light: Inadequate light can result in leggy, elongated microgreens with pale coloration. Use proper lighting, such as full-spectrum LED grow lights, to provide adequate illumination for healthy growth.
To avoid these issues, it’s crucial to start with clean equipment, maintain proper hygiene, monitor environmental conditions, and adjust your hydroponic system as needed. Regular observation and adjustment are key to successful hydroponic microgreen cultivation.
Frequently Asked Questions:
Are hydroponic microgreens healthy?
Hydroponically grown microgreens have the potential to be even more nutritious than their soil-grown counterparts under certain conditions.
Hydroponic microgreens can offer a concentrated source of vitamins, minerals, and phytonutrients. They can be a valuable green addition to a balanced diet, providing flavor, texture, and health benefits in a small package.
And yes, it is possible to grow healthy microgreens in a simple home hydroponic system.
Can all microgreens be grown hydroponically?
While many microgreens can be successfully grown hydroponically, not all varieties are equally well-suited to this method. The choice of microgreens for hydroponic cultivation depends on factors such as their growth characteristics, root systems, and adaptability to the hydroponic environment.
Can microgreens grow to full size when grown hydroponically?
Microgreens are intentionally harvested at an early stage of growth, typically when they have developed their first set of true leaves. Their small size and concentrated flavor make them ideal for adding to salads, sandwiches, and various dishes.
However, if you allow microgreens to continue growing beyond this early stage, they will eventually reach their full mature size, resembling the larger versions of the plant they come from.
How long does it take to harvest microgreens in hydroponics?
The time it takes to harvest microgreens when grown hydroponically can vary depending on several factors, including the specific variety of microgreens, the hydroponic system used, the growing conditions, and your desired level of growth before harvesting.
However, on average, most microgreens are ready for harvest within 7 to 21 days after planting in a hydroponic system.
How do you water hydroponic microgreens?
Watering hydroponic microgreens involves providing a balanced nutrient solution through your chosen hydroponic system. Mix the hydroponic nutrients according to guidelines, ensuring the pH falls within 5.5 to 6.5.
In systems like Nutrient Film Technique (NFT), nutrient solution flows over roots; in drip systems, it’s dripped to plants; Deep Water Culture (DWC) submerges roots; and wick systems draw solution via wicks.
Monitor moisture levels in the growing medium to maintain consistent moisture without waterlogging or drying out. Adjust nutrient solution strength as microgreens grow.
Keep suitable temperature and humidity, regularly inspect for issues, and refresh the nutrient solution after harvesting to sustain growth.
Is tap water okay for microgreens?
If your tap water is safe and meets drinking water standards, it’s likely suitable for growing microgreens. However, if your tap water has a high level of contaminants, salts, or chemicals, it might negatively affect the growth and health of your plants as can undesirable pH and EC readings.
What are the hardest microgreens to grow?
Certain microgreens can be more challenging to grow compared to others due to factors like slower germination, specific growth requirements, or susceptibility to diseases.
While experienced growers can often manage these challenges, beginners might find these varieties more difficult to cultivate.
Here are a few microgreens that are considered relatively challenging to grow:
- Cilantro (Coriander): Cilantro microgreens can be finicky to germinate and grow due to their slower growth rate, susceptibility to damping-off disease, and sensitivity to the growing environment.
- Chervil: Chervil microgreens have a delicate flavor and are slow to germinate and grow. They require specific temperature and light conditions that can be challenging to maintain consistently.
- Carrot: Carrot microgreens have a long germination period and are known for their slow growth. They require patience and careful attention to moisture levels to prevent mold issues.
- Lemon Balm: Lemon balm microgreens can be sensitive to fluctuations in environmental conditions and might take longer to grow compared to other varieties.
- Dill: Dill microgreens can be slow to germinate and might have difficulty establishing a strong root system, making them more prone to disease.
- Marjoram: Marjoram microgreens have specific temperature and humidity requirements that can be challenging to maintain consistently, affecting their germination and growth.
- Fennel: Fennel microgreens can be slow to germinate and might require specific care to prevent damping-off disease and encourage healthy growth.
- Parsley: Parsley microgreens have a long germination period and can be slower to grow compared to other varieties. They can also be prone to damping off if conditions are not ideal.
Get Started Growing Microgreens Today!
Growing microgreens hydroponically is a great way to incorporate more healthy food into your diet while learning all about the basics of hydroponics. Most microgreens can be harvested within a week, and you can continue to grow batch after batch for fresh greens year-round!
Because microgreens are a great source of nutrients, take up little grow space, and have such fast harvest times, it’s no wonder that more and more people are discovering the joys of growing microgreens hydroponically, and so should you!