
Sunflower is a favored option for inexperienced microgreen cultivators due to its taste and is often their first pick.
Whether you’re growing your first tray or troubleshooting an issue you’ve had with your latest sunflower microgreen crop, you’ll find this guide extremely helpful.
Let’s get into it by looking at the basics of sunflower microgreens.
Basics of Microgreens
Taste
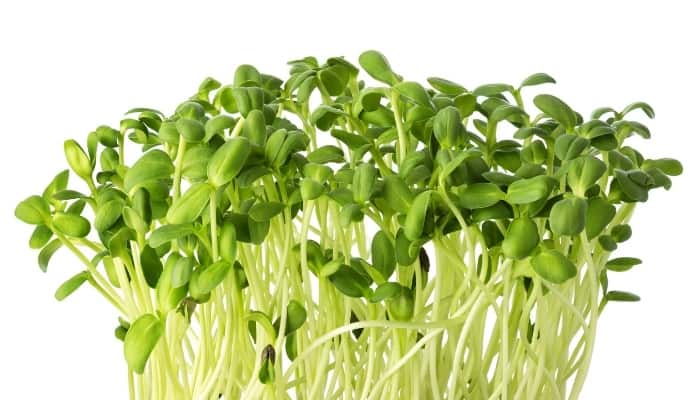
People love sunflower microgreens for their nutty flavor. They retain the flavor of a raw sunflower seed, but also transmit a brighter, fresher taste.
The texture of sunflower microgreens is similar to fresh spinach, with soft and somewhat sturdy leaves and wonderfully crunchy stems.
Nutrition
Sunflower microgreens are one of the most nutritious microgreens out there—possibly one of the most nutritious foods in general.
Microgreens naturally pack a greater concentration of nutrients than older, more developed plants. And with sunflower microgreens in particular, you get an insane burst of nutrition in each bite.
Sunflower microgreens contain loads of calcium, a respectable dose of iron, and plenty of vitamins A, B, C, D, and E.
Germination
To germinate sunflower microgreen seeds, first, you should soak them for four to six hours in water.
After a thorough soaking, fill a tray or container with a layer of potting soil. Then, spread the soaked seeds evenly across the soil.
Next, give the seeds a good watering, making sure both soil and seed are saturated.
Last thing, cover the seeds with another tray, preferably one without holes, and set aside.
After three to four days, your sunflower microgreens will have germinated and will be ready for the next stage of growth.
Harvest
After seven or eight days of growth, including germination, blackout, and exposure to light (more on these below), your sunflower microgreens will be ready to harvest.
Make sure to remove as many seed hulls from the canopy as possible before harvesting with a pair of scissors.
Cut close to the soil level, harvesting handful by handful. Don’t leave any of those delicious seedlings behind!
Types
The most popular type of sunflower seed is “black oil.” This variety is hands-down the most popular for microgreens.
Another type of seed you can find is “striped,” which is the regular kind of seed you may have snacked on or seen on a salad.
Black Oil sunflower seeds (like these from True Leaf Market) are preferable because they have thinner shells than regular seeds. Also, they have a higher oil content. Both varieties are nutritious, but black oil is the seed of choice for microgreens growers.
Other things to consider are whether your seeds are organic or conventional. In general, organic is preferable, because, among other things, no synthetic chemicals are used in the organic growing process. However, organic seeds are more expensive.
Lastly, all types of microgreen seeds should be GMO-free.
Ease of Growing
While sunflower microgreens aren’t the easiest to grow, once you know the steps and precautions to take, it’s quite simple.
High-quality seeds selected specifically for microgreen propagation make a big difference. The germination rate of microgreen seeds is much higher than that of regular seeds.
One thing that makes sunflower microgreens tricky is that you need to pre-soak the seeds. Many seeds don’t require this, but sunflower seeds do.
Many growers over-soak their seeds. I hear people recommending a 24-hour soak, that is way too much!
By cutting the soaking time down to around four to six hours you will increase germination rates. And oversoaked seeds tend to break down quicker, which can cause mold later on.
Another extra step in growing sunflower microgreens is using a weighted tray for germination. To get the best possible yield, you should set up your tray for germination like any other plant, but put a tray with a 5 to 15-pound weight on the cover tray so it pushes down on the seeds. This added weight makes the seedlings grow stronger and forces them to push their roots deeper into the soil.
However, this step is optional. Sunflower microgreens grow just fine without this step, all it does is slightly increase your yields.
After giving sunflower microgreens a few tries, they will seem much less intimidating. After you have some experience, they become just almost as easy as any other type of microgreen.
Growing Sunflower Microgreens
Supplies
- 10×20 growing trays with holes
- 10×20 growing trays without holes
- Black oil sunflower microgreen seeds
- Potting soil
- Spray bottle or watering can
- Liquid fertilizer (optional)
- Growing lights
- 5-15 pound weight (a cement paver brick works well)
- Scissors
Prepping Trays
Start with a 10×20 tray with no holes. This is the base of our growing tray. Place a 10×20 tray with holes inside of it. The top tray will hold the soil and seeds. The holes are to allow the roots to grow down into the bottom tray that will be used for bottom watering (more on this later).
Growing Medium
Next, fill the tray up to the rim with high-quality potting soil. Good soil for sunflower microgreens should have a balance of aeration, drainage, and water capacity. For sunflowers especially, you need soil that won’t compact too much under pressure. I recommend using Happy Frog Potting Soil. This is a great mix of peat moss, perlite, and fertilizer.
Soaking Seeds
The seeds you want to use are black oil sunflower seeds. Compared to regular striped sunflower seeds, black oil seeds have very thin shells and just do much better in a microgreen system.
Check out this article where I share my favorite sources for microgreen seeds online.
Soak your sunflower microgreen seeds for four to six hours before planting. Don’t soak the seeds for too long or they will break down during the grow and possibly cause disease and mold problems.
As soon as your seeds are soaked, they are ready to be planted.
Germination Stage
After soaking, sow about 150 grams of seed into the tray, spreading them evenly. Lightly push the seeds down into the soil. Avoid clumping too many seeds together in one part of the tray. Sowing seeds too closely together can cause disease problems down the road.
Generously water the seeds and soil. Spray the tray until everything is nicely saturated, but not to the point that water is dripping through into the bottom tray.
Cover the seeds with another tray, one with no holes, so the bottom of this new tray is pushing down on the top of the seeds.
Place a weight, like a paver brick or flat stone on top of this tray. The weight should ideally be between 5 and 15 pounds. You can go lower, but don’t go higher or you’ll crush the seedlings!
It’s best to get something wide and flat, as close to the size of the 10×20 tray as possible, for even distribution of weight.
The brick helps to keep germination even, makes the seedlings strong, and forces their roots deeper into the growing medium. This is an optional step. The weight will slightly improve your final harvest—it isn’t required.
Now we can set the stack of trays to the side to germinate for four days.
Each day, once a day, lift up the weight and cover tray, check on your seeds, and give them a light misting of water. By the fourth day of watering, you should see some nice, even germination.
On the fourth day, you can mist the bottom-most tray in addition to the seeds and soil.
Just give a misting to the bottom tray so the roots that reach down there have some extra water and stay white as opposed to turning brown.
Black Out Stage
Now it’s time to ditch the weight.
We will stop pressing down on the seedlings and switch to a black-out configuration to block the light. Darkness is essential for this part of growth.
Cover your germinated seeds with the same tray as before, but this time upside down. Your top tray (cover tray) should be bottom-side up. This creates space above the seedlings so they can grow and blocks out the light.
For two more days, mist the seedlings and the bottom tray twice a day, morning and night.
After misting, return the cover tray to continue blocking out the light.
Under the Lights
On the seventh day, we will lose the cover tray and transition to growing under lights.
During this stage, with the addition of heat and light, our sunflower seedlings need extra water. We will continue watering twice per day, but in addition to misting the top of the seedlings, we will also do what’s called bottom watering.
Bottom watering is simply pouring one cup of nutrient solution (water mixed with fertilizer) into the bottom tray to feed the roots directly.
To make a sunflower microgreens nutrient solution, mix ½ an ounce of Ocean Solution fertilizer with one gallon of water. This volume of solution will be enough for you to see your microgreens through harvest.
To recap, continue watering twice a day. Each watering session should consist of a misting of the seedlings and one cup of nutrient solution into the bottom tray.
Do this for two more days.
Time to Harvest
On the eighth day, your microgreens should be looking tall, green, full, and delicious. This means it’s time to harvest!
Don’t water the microgreens before harvesting. Any extra water at this point would increase the chance of mold growth during storage.
Take a clean pair of scissors. Gently grab one handful of microgreens at a time and cut it free as close to the soil level as you can without actually touching the soil.
Work slowly, being careful not to stir up any soil onto the edible parts of the seedlings.
Storing Microgreens
Your sunflower microgreens can be eaten immediately or stored in the refrigerator. These microgreens don’t need to be washed.
Gently fill an airtight plastic bag with your microgreens. Slip a paper towel or two into the bag to absorb moisture and prevent mold. Seal the bag and refrigerate. These will keep in the fridge for at least a week up to a month
If you would like to wash these, wash them immediately before eating. Getting sunflower microgreens wet before storing them will inevitably lead to mold problems.
How To Eat Sunflower Microgreens
Sunflower microgreens can be eaten a million different ways. The nutty, crisp flavor is surprisingly versatile.
Try stuffing a heap of them in a sandwich or burger. Put them on a pizza, in tacos, scrambled eggs—you can get creative with them.
And of course, these will taste great in just about any salad you can think of.
If you have never tried sunflower microgreens before, the first thing you should do is pop a couple of them in your mouth, raw. There’s nothing quite like the taste of really fresh microgreens.
As a garnish, these little flavor bombs will add color and excitement to the plate. Just sprinkle a few whole microgreens around a steak, chicken breast, or piece of fish to take your plating game to the next level.
If you’re into smoothies, know that sunflower microgreens are a great addition to any blender. Orange, mango, banana, chia seeds, and sunflower microgreens is a personal favorite of mine.
The nuttiness of the microgreens balances out the acidity and sweetness of the mango. On a hot day, just add ice and you’ve got a refreshing, nutrient-packed drink to die for.
For a simple introduction to cooked sunflower microgreens, try sauteeing them in olive oil with salt and pepper. Take those beauties out of the pan and hit them with a dash of balsamic vinaigrette or a squeeze of lime juice.
Your taste buds will thank you.
And if you’re feeling cheffy—try one of these great recipes that highlight the flavor of your ultra-nutritious sunflower microgreens:
- Red Quinoa, Radishes, Sunflower Microgreens & Pickled Garlic Scape Salad
- Roasted Broccoli Microgreen Soup
- Potato Salad with Sunflower Greens
- Raw Sunflower Sprout Pâté
- Sweet & Spicy Microgreens Slaw
- Yellow Beet Carpaccio with Sunflower Sprouts
Related Questions
Can you grow sunflower microgreens without soil?
While it’s possible to grow sunflower microgreens without soil using hydroponics or a growing pad—it isn’t recommended.
Sunflower microgreens are sturdier than most microgreens and benefit from deeper root growth. If you grow on a soilless growing pad (hemp, burlap, BioStrate, etc.), the roots will have trouble supporting the plant.
Some growers have had success with hydroponic, soil-free sunflower microgreens, but when possible, soil works best.
Do microgreens regrow after cutting?
Some microgreens can regrow after cutting. Peas, for example, can regrow if you carefully harvest, leaving the lower level of leaves intact.
Sunflower microgreens, on the other hand, don’t regrow after harvest. Without leaves, photosynthesis won’t occur and the seedlings just won’t grow.
Once you cut, the door is shut.
Which is better: sunflower sprouts or microgreens?
For me, sunflower microgreens are better than sunflower sprouts. With microgreens, you get a significantly larger harvest.
One tray of sunflower microgreens is worth several jars of sprouts in terms of weight and volume.
Sprouts are grown only in water, without soil or fertilizer. Microgreens are grown in soil or soilless media and spend more time photosynthesizing and growing than sprouts do.
Not only do soil and fertilizer add nutrients to the plants, but the soil actually adds flavor too.
Many growers prefer the taste of sunflower seeds grown in soil to ones grown in just water.
While sprouts can be great—for me, the large harvests, flavor, and nutritional benefits of microgreens edge out the win.