
Composting is one of the best things you can do for your garden and your wallet. It turns kitchen scraps and yard waste into rich, dark soil amendment that improves drainage, feeds your plants, and cuts down on how much you spend on fertilizer and bagged compost.
The process sounds complicated until you realize it’s basically just organized rotting. Nature does most of the work. You just set it up right.
This guide covers everything a beginner needs to know about how to start a compost pile, including what the browns-to-greens ratio actually means, how to tell if your pile is healthy, what should absolutely never go in, and how to fix common problems before they get out of hand.
Whether you have a big backyard or a small raised bed setup, composting is worth it.
What Is Composting (and Why Bother)?
Composting is the process of breaking down organic material, such as food scraps, yard trimmings, and cardboard, into humus, a nutrient-dense soil conditioner.
Microbes, fungi, worms, and other decomposers do the heavy lifting. Your job is to give them the right environment, which means the right mix of materials, adequate moisture, and enough airflow to keep them working.
The end product, finished compost, looks and smells like dark, crumbly earth. Mixed into garden beds or used as top dressing, it feeds plants slowly over time, helps sandy soils retain moisture, loosens clay soils, and reduces the need for synthetic fertilizers.
From a practical standpoint, composting also cuts down on what goes to the landfill.
The average household throws away a significant amount of compostable material every week, such as vegetable peels, coffee grounds, eggshells, and cardboard boxes. All of that can feed your garden instead.
What You’ll Need Before You Start
You don’t need much. A compost pile can be as simple as a heap in the corner of your yard or as structured as a multi-bin system. Here’s what to have ready:
- A location: At least 3 feet by 3 feet of ground space, ideally in partial shade
- A pitchfork or garden fork for turning
- A bin or enclosure (optional but helpful): Wood pallets, wire mesh, or a purchased plastic bin all work
- Your raw materials (more on those below)
- Access to water
If you’re just getting started, a simple wire bin or even a freestanding pile works fine. You can always upgrade later.
Browns vs. Greens: The Ratio That Makes or Breaks Your Pile
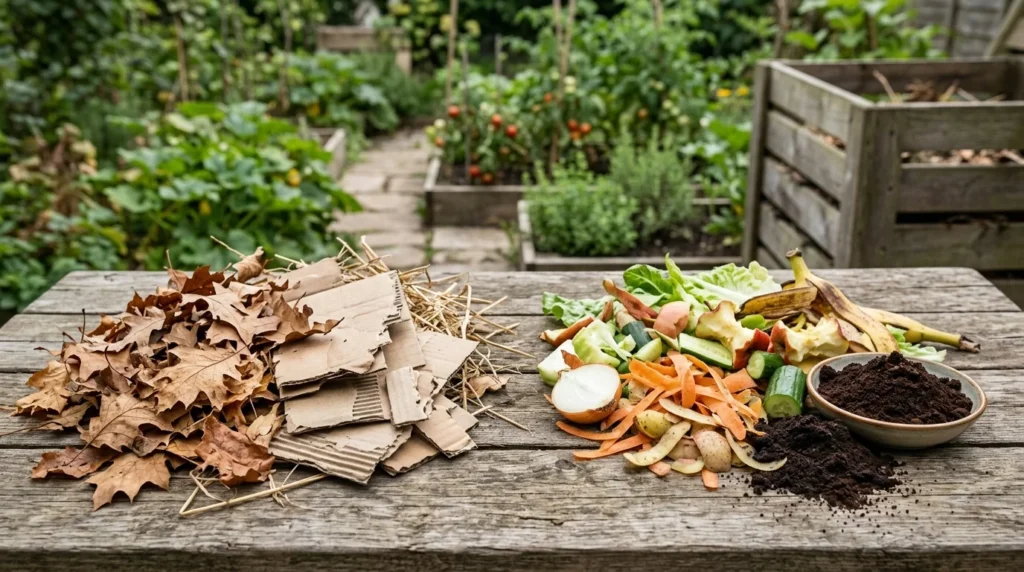
Every composting guide talks about browns and greens, and for good reason. Getting this ratio right is what separates a pile that works from one that just sits there.
Browns are carbon-rich materials. They provide structure and energy for decomposers. Examples include dry leaves, cardboard, straw, wood chips, paper bags, newspaper, sawdust (from untreated wood), and dryer lint from natural fibers.
Greens are nitrogen-rich materials. They kick-start the decomposition process and keep microbes active. Examples include vegetable and fruit scraps, coffee grounds, fresh grass clippings, garden trimmings, eggshells, and tea bags.
The general rule of thumb is a 2:1 to 3:1 ratio of browns to greens by volume, not by weight. Too many greens, and your pile turns slimy and smells like ammonia. Too many browns, and it dries out and stalls.
Most beginners err on the side of too many greens (because that’s what they have), so make a habit of stockpiling dry leaves in fall and keeping a stash nearby.
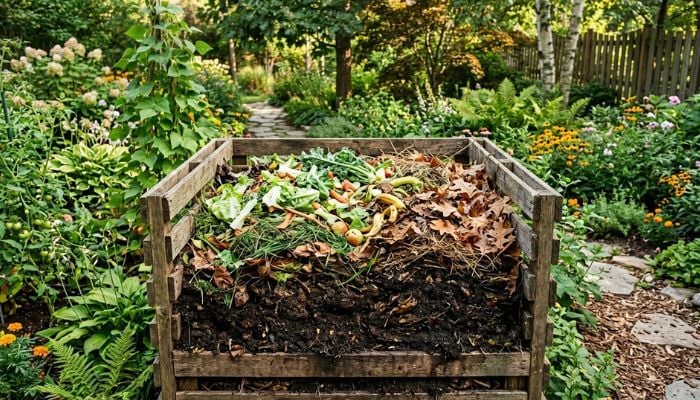
How To Build a Compost Pile Step by Step
Building a compost pile isn’t complicated, but starting with the right foundation makes a real difference.
- Choose your spot. Pick a level area with good drainage. Partial shade helps prevent the pile from drying out too fast in summer.
- Start with a coarse layer. Put down a 3–4 inch base of coarse browns such as wood chips, straw, or twigs. This allows airflow underneath the pile and absorbs excess moisture.
- Add your greens. Layer fresh kitchen scraps, grass clippings, or garden waste on top of the browns base.
- Cover with more browns. Always finish each addition of greens with a layer of browns to reduce odor and balance the ratio.
- Moisten if needed. The pile should feel like a wrung-out sponge, i.e., damp throughout but not dripping. Dry material slows decomposition significantly.
- Repeat as you add material. Every time you add scraps, bury them in the center of the pile and cover with browns.
- Turn it regularly. Use a pitchfork to turn the pile every 1–2 weeks. This aerates the pile, redistributes moisture, and speeds things up.
A well-built pile will begin to heat up within a few days. Temperatures in the center can reach 130–160°F, which is hot enough to kill most weed seeds and pathogens.
What NOT To Put in Your Compost Pile
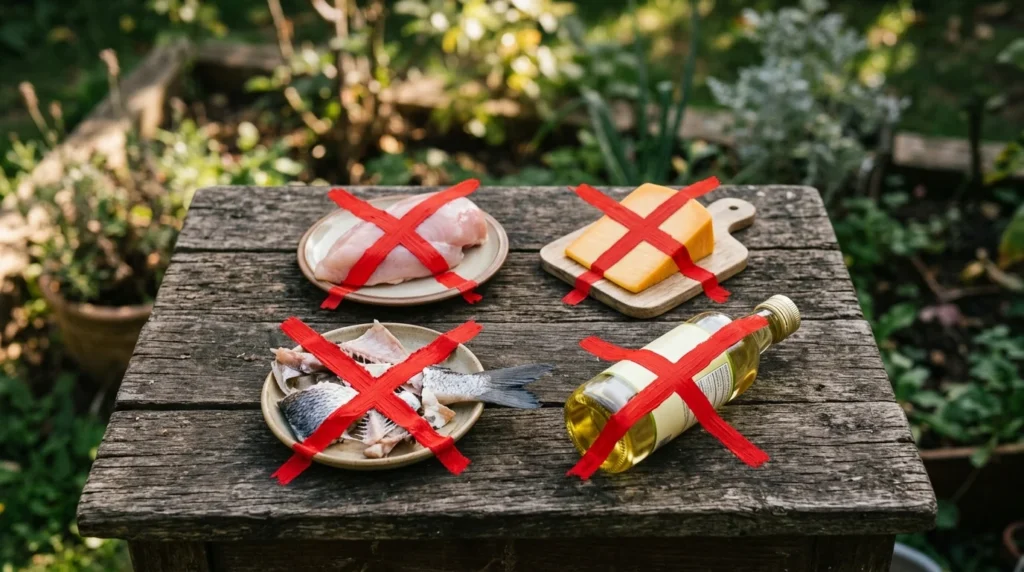
This is where a lot of beginners go wrong. Some materials slow decomposition, attract pests, or introduce pathogens that survive the composting process. Keep these out entirely.
Meat, Fish, and Bones
Raw or cooked meat, fish scraps, and bones attract rats, raccoons, and other animals looking for an easy meal. They also create serious odor problems as they break down. Even if you have a fully enclosed bin, it’s not worth the risk for a backyard pile.
Dairy Products
Milk, cheese, butter, and yogurt cause the same problems as meat. They decompose into compounds that smell terrible and bring in scavengers. Leave dairy out.
Oils and Fatty Foods
Oily foods coat other compost materials and create a barrier that repels water and slows microbial activity. Heavily oiled or fried foods also attract pests. Skip them.
Pet Waste
Dog and cat feces contain pathogens such as bacteria and parasites that can survive in a typical backyard compost pile and potentially contaminate your garden soil.
Herbivore manure, however (rabbit, chicken, horse, etc.), is fine and is actually excellent for compost. Carnivore and omnivore waste is not.
Diseased or Pest-Infested Plant Material
If a plant had a serious fungal disease, bacterial blight, or pest infestation, don’t put it in your pile. Most backyard piles don’t get hot enough consistently to kill pathogens.
The disease can persist in your finished compost and re-infect your garden the following season. Bag diseased material and dispose of it separately.
Treated Wood and Sawdust
Sawdust from untreated, natural wood is fine. Sawdust or chips from pressure-treated lumber or chemically treated wood can introduce compounds you don’t want in your garden soil.
Anything With Herbicides or Pesticides
Clippings from lawns treated with persistent herbicides (like aminopyralid) can carry those chemicals through the composting process and harm your plants. If you’re not sure whether grass clippings or hay have been treated, don’t risk it.
What About Other Items?
Some materials sit in a gray zone, technically compostable but with caveats worth knowing.
- Pine needles take a long time to break down and are slightly acidic, but they’re not harmful to compost. Shred them if possible and use in moderation. If you’re adding a lot, balance with lime or wood ash. We go deeper on this in our guide to composting pine needles.
- Dryer lint is compostable if it comes from natural fiber laundry (cotton, wool, linen, etc.). Lint from synthetic fabrics (polyester, nylon, etc.) contains microplastics and shouldn’t go in your bin. See our composting dryer lint guide for more details.
- Citrus peels are fine in moderate amounts, despite what you may have heard. The myth that citrus kills worms is largely exaggerated; just don’t dump a pile of peels all at once. Learn more in our guide to composting citrus.
- Cardboard is one of the best browns you can use. Shred it first, and remove any glossy coatings or tape. Pizza boxes with some grease are generally fine.
- Eggshells add calcium, break down slowly, and are a worthwhile addition. Rinse them first to avoid attracting pests.
How To Maintain Your Compost Pile
Building the pile is the start. Maintaining it is what turns raw material into finished compost.
The “Damp Sponge” Moisture Test
Reach into the center of your pile and grab a handful. Squeeze it. A healthy pile should feel like a wrung-out sponge, moist but not dripping. If it’s dry, add water or incorporate more wet greens. If it’s sopping, add browns and turn it to increase airflow.
Turning Your Pile
Turning introduces oxygen, which the aerobic bacteria doing most of your decomposition need to thrive. It also redistributes heat and moisture, moves outer material to the hot center, and speeds up the whole process significantly.
Turn every 1–2 weeks for a hot, fast pile. If you’re in no rush, turning once a month still produces good compost; it just takes longer (6–12 months instead of 2–3).
Troubleshooting Common Compost Problems
Even a well-built pile runs into problems sometimes. Here’s how to read what your pile is telling you.
My Pile Smells Like Rotten Eggs or Ammonia
- Rotten egg smell: The pile is anaerobic, which means there’s not enough oxygen. It’s too wet, it’s too compacted, or it hasn’t been turned. Add browns, turn it thoroughly, and let it breathe.
- Ammonia smell: Too much nitrogen (too many greens). Add more browns, such as shredded cardboard, dry leaves, or straw, and turn to incorporate.
My Pile Won’t Heat Up
A cold, inactive pile usually means one of a few things: it’s too dry, it doesn’t have enough nitrogen to feed the microbes, it’s too small to retain heat, or it’s been too long between turnings.
Add a layer of fresh greens (grass clippings or kitchen scraps work well), water it down if it’s dry, and turn. If your pile is smaller than 3 feet by 3 feet, it may not retain enough heat to work efficiently; try building it bigger.
My Pile Is Full of Flies or Fruit Flies
Fruit flies typically mean food scraps are exposed at the surface. Always bury new kitchen scraps in the center of the pile and cover with a layer of browns. A loose-fitting lid or extra brown layer on top helps too.
My Pile Attracts Pests (Rats, Raccoons)
The presence of pests usually means that meat, dairy, or cooked food is in the pile. Remove it if possible and stop adding those materials. An enclosed bin with a secure lid is the most effective deterrent if wildlife is an ongoing problem.
How To Know When Your Compost Is Ready
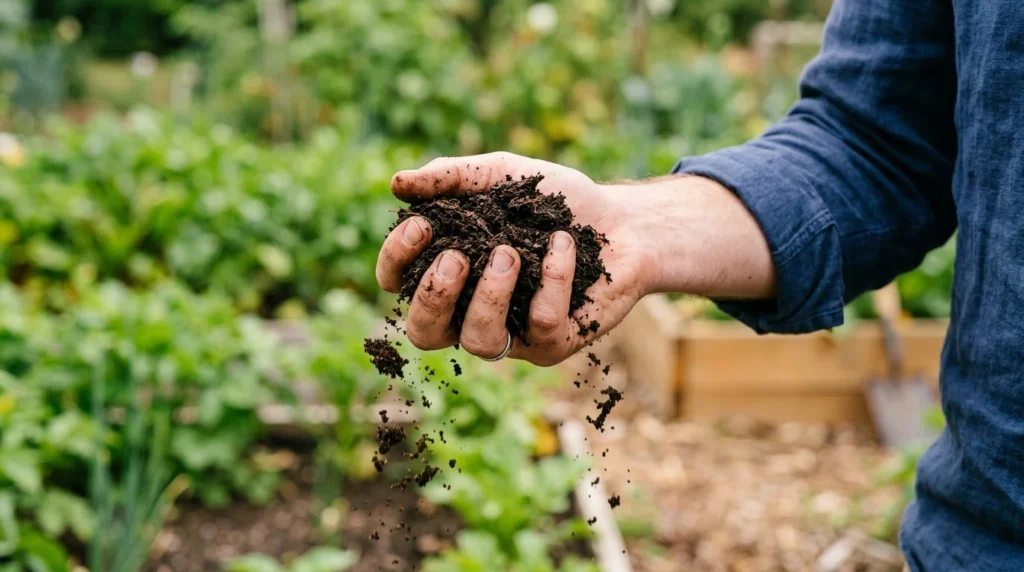
Finished compost is dark brown to black, crumbly, and smells like rich earth, not like rot or ammonia. You should not be able to identify individual ingredients. If you can still see eggshells or large chunks of leaves, it’s not done.
Depending on your composting method, finished compost takes anywhere from 2 months (hot, frequently turned pile) to 12+ months (cold, low-maintenance pile).
A good trick is to stop adding material to one bin and let it cure while you start a second pile for fresh inputs. This gives you a steady supply without interrupting the finishing process.
Use finished compost to top-dress garden beds, mix into potting soil, work it into transplant holes, or apply around the base of fruiting plants.
Your soil and your plants will notice the difference quickly.
Compost: Your Garden’s Unsung Hero
Starting a compost pile is one of the most useful things you can do for your home garden, and it’s a lot more forgiving than most beginners expect.
You don’t need the perfect setup or a strict routine. You just need the right mix of materials, occasional moisture checks, and a turn every week or two.
The most common mistakes, such as adding the wrong materials, getting the browns-to-greens ratio off, or letting the pile dry out, are all easy to correct once you know what to look for.
Use the troubleshooting section above the first time something seems off, and you’ll be back on track quickly.
Once you’ve got your first pile going and start to understand how your materials behave, you can look into ways to speed things up.
Shredding material before it goes in, keeping a consistent moisture level, and turning more frequently are the three biggest levers.
Composting rewards consistency more than perfection. Start a pile this week and trust the process.