
Water bath canning is one of the oldest and most reliable ways to preserve food at home, and it’s a lot more approachable than most people think. If you’ve ever stood over a pot of simmering jam or hauled in more tomatoes than you can eat in a week, this method was made for you.
The process comes down to a simple principle: heat destroys spoilage organisms, and a vacuum seal keeps them out.
When you process filled jars in boiling water, you kill off bacteria, molds, and yeasts while driving air out of the jar to create a sealed lid. Done correctly, the result is shelf-stable food that can last a year or more.
This guide covers everything you need to know to start water bath canning safely, including the right equipment, how to prep your jars, how long to process different foods, how altitude affects your process, and how to confirm your seals held.
Think of this as the technical foundation for every water bath canning recipe you’ll ever use.
What You Can (and Can’t) Water Bath Can
Water bath canning is safe for high-acid foods, i.e., those with a pH of 4.6 or below. That acidity level prevents the growth of Clostridium botulinum, the bacterium responsible for botulism.
Boiling water (212°F at sea level) is hot enough to destroy most spoilage organisms in high-acid environments, but it is not hot enough to neutralize botulism spores in low-acid foods.
High-acid foods safe for water bath canning:
- Fruits and fruit juices
- Jams, jellies, and preserves
- Pickles (properly acidified)
- Tomatoes and tomato products (with added acid)
- Fruit butters and chutneys
Foods that require pressure canning instead:
- Vegetables (except pickled)
- Meats, poultry, and fish
- Beans (except pickled)
- Soups and stews
- Low-acid salsas
Tomatoes sit right on the pH borderline. Modern canning guidelines require adding bottled lemon juice or citric acid to every jar of canned tomatoes to bring the acidity up to a safe level. This isn’t optional. See our guide on canning tomatoes at home for the full process.
Equipment You Need Before You Start
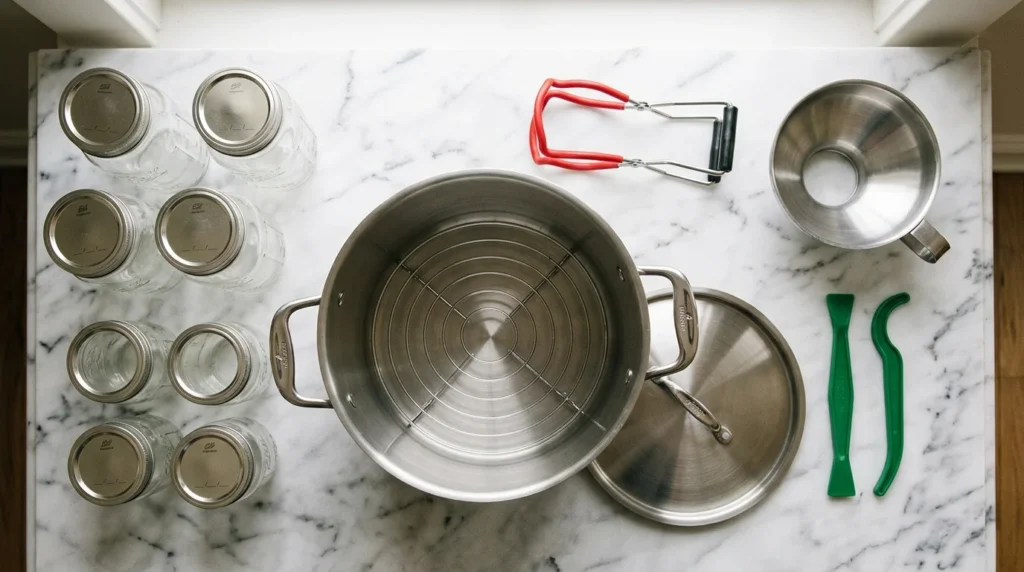
The Water Bath Canner
A water bath canner is a large, deep stockpot with a fitted lid and a wire or perforated rack inside. The rack lifts the jars off the bottom of the pot so boiling water can circulate underneath. Direct contact with the hot metal bottom can crack jars or cause uneven heating.
Standard canners hold 7 quart jars or up to 9 pint jars at a time. You can use any large stockpot as a substitute, provided it’s deep enough for the jars to be covered by at least 1–2 inches of water with room to boil. A round cake cooling rack works as a jar rack in a pinch.
Jars, Lids, and Bands
Use only purpose-made canning jars (Ball, Kerr, and Bernardin are the most common brands). Standard mason jars come in four main sizes:
- Half-pint (8 oz): Ideal for jams, jellies, and small-batch preserves.
- Pint (16 oz): The most versatile size for pickles, tomato sauce, and salsas.
- Quart (32 oz): Best for whole tomatoes, juice, and large-batch items.
- Half-gallon (64 oz): Approved only for fruit juices in water bath canning.
Inspect jars for chips or cracks before each use. Even a hairline crack in the rim will prevent a proper seal. Jars can be reused indefinitely as long as they’re intact.
Two-piece lids consist of a flat disc (the lid) and a screw band. Lids should only be used once for canning because the sealing compound on the underside degrades after processing and won’t seal reliably a second time.
Screw bands can be reused as long as they’re not bent or rusted.
Other Essential Tools
- Jar lifter: Rubberized tong designed to grip jar necks; required for safely moving hot jars in and out of boiling water.
- Wide-mouth canning funnel: Keeps jar rims clean and prevents overfilling.
- Bubble remover and headspace tool: A thin spatula-style tool used to release air pockets and measure headspace; a thin knife works too.
- Clean cloths or paper towels: For wiping jar rims before lidding.
How To Prepare Your Jars
Cleanliness is essential. Wash jars, lids, and bands in hot soapy water, and rinse well. Jars don’t need to be sterilized if your processing time is 10 minutes or more, which covers most recipes. For recipes with shorter processing times, sterilize jars by boiling them for 10 minutes first.
Keep jars hot until you’re ready to fill them. Cold jars introduced to a hot product can crack from thermal shock, and that temperature difference can compromise your seal. Either keep jars in a pot of simmering water or run them through a dishwasher on a hot cycle with heated dry.
Lids should be warm but not boiled. Place them in a small bowl of hot (not simmering) water until you’re ready to use them. Old guidance called for simmering lids for 10 minutes, but this is no longer recommended, as excessive heat softens the sealing compound.
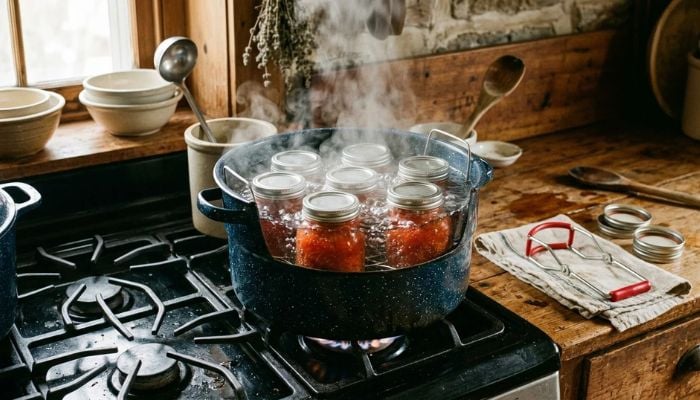
The Water Bath Canning Process, Step by Step
- Fill your canner about halfway with water and begin heating it. You want the water hot but not fully boiling when jars go in. This prevents thermal shock.
- Prepare your recipe, and have your product hot and ready to fill.
- Remove jars from their warming water. Using your canning funnel, fill each jar with your hot product, leaving the correct headspace.
- Run your bubble remover or a thin knife around the inside of the jar to release any trapped air pockets.
- Wipe each jar rim with a clean, damp cloth to remove any residue. Even a small amount of food on the rim can prevent a seal.
- Place a lid on each jar (sealing compound side down), and apply a screw band until it’s just fingertip tight. This means snug but not cranked down hard. Overtightening prevents air from escaping during processing, which interferes with the seal forming.
- Lower filled jars into the canner using your jar lifter. Jars should not touch each other.
- Add more hot water if needed so jars are covered by at least 1 inch of water.
- Cover the canner, bring to a full rolling boil, and begin your processing timer.
- When processing time is complete, turn off the heat, remove the lid, and let the canner sit undisturbed for 5 minutes.
- Remove jars with your jar lifter, and place them upright on a folded towel. Leave 1 inch of space between jars.
- Do not adjust lids, tilt jars, or press lid centers while hot. Leave jars undisturbed for 12–24 hours.
Headspace: Why It Matters and How Much To Leave
Headspace is the empty space between the top of your product and the underside of the lid. It’s not arbitrary; it directly affects whether your jar seals properly.
Too much headspace means there’s excess air left in the jar, which can prevent a full vacuum seal and cause discoloration near the top.
Too little headspace leaves no room for the product to expand during processing; it can bubble up under the lid or into the seal area, blocking closure.
Standard headspace guidelines:
- 1/4 inch for jams, jellies, and preserves
- 1/2 inch for most pickles, fruits, and tomatoes
- 1 inch for foods with starch or thick sauces (tomato juice, tomato sauce, etc.)
Always follow the specific headspace listed in your recipe. When in doubt, 1/2 inch is the most common guideline for water bath canning.
Processing Times by Jar Size
Processing time varies by food, recipe, and jar size. Larger jars take longer for the heat to fully penetrate the center.
The following is a general reference. Always use the processing times from a tested recipe sourced from the USDA, Ball Blue Book Guide to Preserving, or the National Center for Home Food Preservation.
General processing time adjustments by jar size at sea level:
- Half-pint: Use the time listed in the recipe.
- Pint: Add 5 minutes to the half-pint time if only a half-pint time is given.
- Quart: Add 10 minutes to the half-pint time if only a half-pint time is given.
Most recipes specify pint times directly. When a recipe provides times for multiple jar sizes, always use the time listed for the size you’re actually using.
Altitude Adjustments for Water Bath Canning
Water boils at a lower temperature at higher elevations. At sea level, water boils at 212°F. At 5,000 feet, it boils around 202°F, which is a difference significant enough to under-process your jars if you don’t compensate. The fix is simple: increase your processing time.
Altitude adjustment chart (additional minutes to add to the recipe’s base processing time):
- 0–1,000 ft.: No adjustment needed
- 1,001–3,000 ft.: Add 5 minutes
- 3,001–6,000 ft.: Add 10 minutes
- 6,001–8,000 ft.: Add 15 minutes
- 8,001–10,000 ft.: Add 20 minutes
If you’re not sure of your altitude, search your city name plus “elevation in feet.” Most online sources will give you an accurate number in seconds.
How To Check Your Seals
After jars have cooled undisturbed for 12–24 hours, confirm every seal before storing.
There are three ways to check:
- Press test: Press the center of each lid. A properly sealed lid will not flex or spring back. If it pops up when you press it, the jar did not seal.
- Tap test: Tap the lid center with a metal spoon. A sealed lid produces a clear, high-pitched ring. A hollow or dull thud indicates a failed seal or that food is touching the lid from the inside.
- Visual check: Sealed lids curve slightly downward in the center. An unsealed lid sits flat or domes upward.
After confirming seals, remove the screw bands, wipe the outside of the jars clean, and label each jar with the contents and date. Store in a cool, dark location. Properly sealed jars are shelf-stable for 12–18 months, though quality is best in the first year.
Refrigerate any jars that failed to seal and use within 1–2 weeks, or reprocess within 24 hours using a new lid, though reprocessed food may lose some quality.
Troubleshooting Common Problems
Lid didn’t seal:
- Jar rim wasn’t wiped clean before lidding.
- Band was overtightened before processing.
- Jar had a chip or crack you missed during inspection.
- Product boiled up and got under the lid during processing.
Liquid was lost during processing (siphoning):
- The boil fluctuated during processing time.
- Jars were removed too quickly after processing.
- Band was overtightened before processing.
- Minor siphoning doesn’t affect safety if the jar sealed, but it may shorten shelf life.
Jar cracked in the canner:
- Jar was cold or room-temperature when placed in hot water.
- Jar had a hairline crack or flaw before processing.
Jar appeared sealed but popped open in storage:
- Something on the rim interfered with the original seal.
- Do not taste; discard safely, and don’t attempt to reuse the lid.
If you notice any unusual odor, color, or bubbling when you open a jar, discard it without tasting. When in doubt, throw it out.
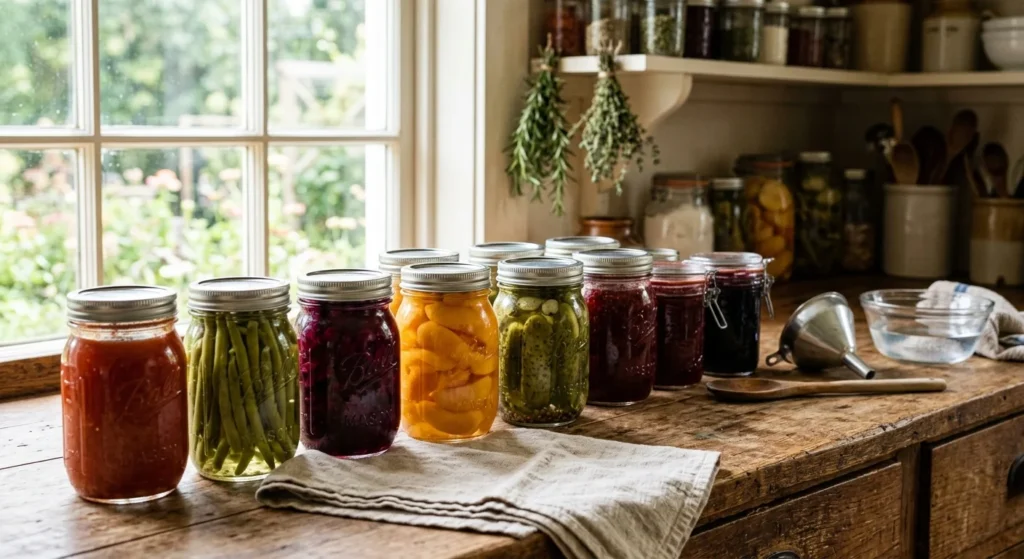
Stockpile Shelf-Stable Food the Smart Way
Once you’ve done a couple of batches, water bath canning doesn’t feel complicated anymore and starts becoming quite satisfying. The first run always takes the longest because you’re learning the rhythm, but by the time you’re lidding your third jar, it clicks.
Start with something forgiving, such as a strawberry jam, a simple bread-and-butter pickle, or crushed tomatoes. Build your confidence there before moving into more technical recipes.
Understanding the process at a technique level, not just following a single recipe, is what separates a capable home canner from someone who only succeeds when conditions are perfect.
Knowing why you leave a 1/2-inch headspace, why altitude affects your timing, and why you wipe the rim before lidding makes you a better canner every time you fire up the pot.
If you’re new to home preservation entirely, our canning for beginners overview covers the full picture, including when to use pressure canning instead.