
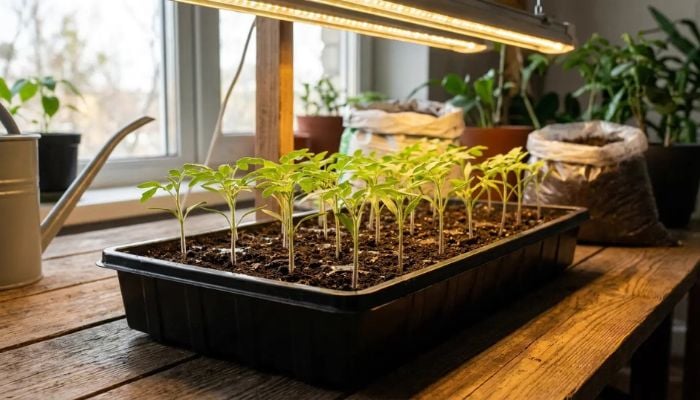
Buying tomato transplants from a nursery is perfectly fine, but once you’ve grown your own from seed, it’s hard to go back.
You get access to hundreds of varieties you’ll never see on a nursery shelf, such as heirlooms, paste tomatoes, tiny cherries in every color, and low-acid varieties the grocery store doesn’t carry.
You save money, and there’s something genuinely satisfying about eating a tomato you’ve grown from the very beginning.
Learning how to grow tomatoes from seed isn’t complicated, but the process does require timing, the right setup, and a bit of patience.
This guide walks you through everything you need to know, including when to start seeds, what you need, how to care for seedlings indoors, and how to get them into the garden without losing weeks of progress to transplant shock.
If you’ve never started seeds indoors before, tomatoes are one of the best first crops to try. They germinate fast, they respond well to basic care, and the variety selection alone makes the effort worthwhile.
Why Grow Tomatoes From Seed?
The most compelling reason is variety. Walk into any nursery in the spring, and you’ll find a few dozen tomato transplants, mostly cherry types, a couple of slicers, maybe one heirloom if you’re lucky.
Search a seed catalog, and you’ll find hundreds. Brandywine, Cherokee Purple, San Marzano, Sungold, Black Krim, Green Zebra, and so on. These aren’t reliably available as transplants in most areas, but all of them are worth growing at least once.
Cost is the other factor. A packet of 25–30 seeds often costs the same as a single nursery transplant. If you’re growing multiple varieties or feeding a large household, the math adds up fast.
Start more than you need, share the extras with neighbors, and you’ll be the most popular person at the beginning of every growing season.
When To Start Tomato Seeds Indoors
The single most important rule is to count back from your last frost date. Tomatoes need 6–8 weeks indoors before they’re ready to go outside. That’s the window.
Starting earlier doesn’t give you a head start; it gives you root-bound, stressed plants that struggle to establish once they hit the garden.
Starting too early is the most common seed-starting mistake beginners make. Seedlings started 10–12 weeks before the last frost run out of room in their containers, get leggy, and arrive in the garden already depleted.
A compact, 6-week-old seedling will outperform an overgrown 10-week-old plant within a few weeks of transplanting.
To find your last frost date, search “last frost date [your city]” or use the Old Farmer’s Almanac. Once you have it, count back 6–8 weeks. That’s your seed-starting window.
For most of the continental U.S., this puts seed starting somewhere between late February and late March. Gardeners in warmer zones (8–10) can start as early as January. Those in colder zones (3–5) may not start until late March or early April.
If you’re not sure which zone you’re in, the USDA Plant Hardiness Zone Map is the standard reference.
What You Need To Start Tomato Seeds
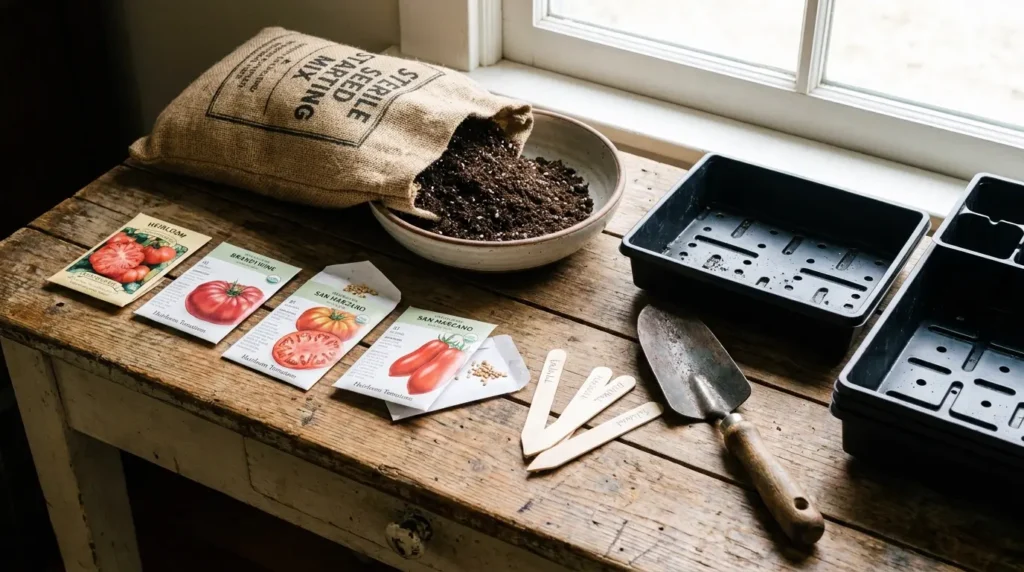
You don’t need a dedicated greenhouse or a lot of expensive equipment, but a few things genuinely matter.
Seed-Starting Mix
This is not the same as potting mix or garden soil. Seed-starting mix is finer, lighter, and sterile, all of which matter for seedlings.
Heavy potting mixes retain too much moisture and can suffocate young roots. Garden soil compacts and may carry pathogens.
If you have an old bag of seed-starting mix from a previous season, check whether it’s still good before using it; seed-starting mix can degrade over time, just like potting soil.
Containers
Six-cell plug trays, small plastic pots, or biodegradable peat pots all work. Recycled yogurt containers work too if you poke drainage holes in the bottom.
Whatever you use, drainage holes are non-negotiable. Waterlogged soil is the fastest way to lose seedlings.
Light
This is where most indoor seed starts fall short. A south-facing window delivers maybe 4–6 hours of usable light in late winter, which is not even close to what tomato seedlings need. They want 14–16 hours a day.
A basic two-bulb LED shop light or an affordable grow light makes an enormous difference in seedling quality.
Seedlings grown under good light will be compact, sturdy, and dark green. Seedlings grown under inadequate light will be tall, pale, and floppy, a condition called “legginess” that’s hard to recover from.
Heat
Tomato seeds germinate best at soil temperatures of 70–80°F.
A seedling heat mat under your trays speeds up germination noticeably. Most seeds sprout in 5–7 days with bottom heat, vs. 10–14 days at room temperature.
Heat mats are optional, but if you plan to start seeds every year, they’re worth the one-time investment.
Seeds
Choose varieties suited to your climate and goals. Cherry tomatoes are the most forgiving for beginners and produce the longest season.
Paste tomatoes are ideal if you plan to can your tomato harvest. For heirlooms, expect a slightly longer growing season and more variation in fruit size but exceptional flavor.
How To Sow Tomato Seeds
- Fill containers to within ½ inch of the rim with moist seed starting mix. It should feel damp but not dripping.
- Make a small indent about ¼ inch deep in each cell.
- Drop 2 seeds per cell. This gives you a germination backup. You’ll thin to one seedling once they sprout.
- Cover lightly with seed starting mix, and press gently to ensure seed-to-soil contact.
- Water from the bottom by setting trays in a shallow pan of water until the surface feels evenly moist, then remove.
- Cover with a plastic dome or loose plastic wrap to hold humidity.
- Place on a heat mat or in a consistently warm spot. Seeds don’t need light until they germinate.
- Check daily. Most tomato seeds sprout in 5–10 days. Once you see the first seedlings emerge, remove the cover and move the tray directly under grow lights.
Caring for Tomato Seedlings
Light
The grow light should be on 14–16 hours per day, positioned 2–3 inches above the seedling tops. Raise it as they grow.
If your seedlings are stretching toward the light with long gaps between leaves, the light is too far away or the day length is too short. Compact, dark green growth means you’re on the right track.
Watering
Bottom watering continues to be the best method throughout the seedling stage.
Let the soil dry slightly between waterings. Check by sticking a finger an inch into the mix. If it’s still damp, wait. Overwatering is the top cause of seedling death indoors.
Thinning
Once seedlings have their first set of true leaves (the second set to emerge, not the rounded seed leaves but the jagged ones), thin each cell to one plant.
Use scissors to snip the weaker seedling at the soil level. Don’t pull it out; you’ll disturb the roots of the one you’re keeping.
Fertilizing
Seed starting mix contains little to no nutrients by design. Once seedlings have their first true leaves, start feeding with a balanced liquid fertilizer diluted to half strength, once a week.
Tomatoes are heavy feeders, and seedlings that don’t get nutrients during this stage often arrive at transplant time pale and stunted.
Potting Up
When roots start circling the bottom of the cells or poking through drainage holes, it’s time to move up to 4-inch containers.
Tomatoes can be buried deep, up to two-thirds of the stem, and they’ll develop roots along the buried portion. Use this technique every time you pot up, and you’ll produce a strong, dense root system before the plant ever reaches the garden.
Hardening Off: The Step Most Beginners Skip
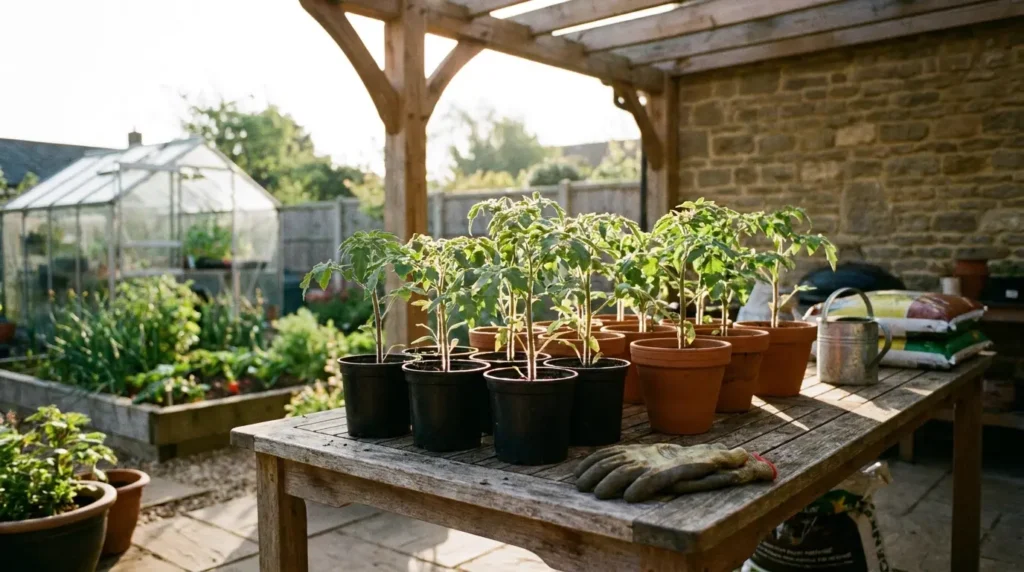
Indoor seedlings have spent their entire lives under controlled conditions. Direct outdoor sun, wind, and temperature swings are foreign to them.
Hardening off is the process of introducing those conditions gradually so transplant shock is minimal.
Start 7–10 days before your planned transplant date. On the first day, set plants in a sheltered, shady spot outdoors for about an hour, then bring them back inside.
Each day, extend the outdoor time and gradually move them into more sun. By day 7–8, they should be spending the full day outside, including direct afternoon sun.
Skipping this step, or rushing it, leads to bleached, scorched leaves and a plant that spends two weeks recovering instead of growing.
It costs almost no time when done gradually, and the difference in transplant success is significant.
Transplanting Tomatoes to the Garden
Don’t transplant until after your last frost date has passed and nighttime temperatures are consistently above 50°F. Even without frost risk, cold soil slows root establishment and can stall a young plant for weeks.
Prepare your planting holes generously. Dig deep enough to bury the plant up to its lowest set of leaves, or even deeper if the plant is tall.
Strip any leaves that would be below the soil surface. The buried stem will sprout new roots, anchoring the plant more deeply and improving drought tolerance all season.
Water in well after planting. A diluted balanced fertilizer in the first watering helps seedlings transition. Avoid high-nitrogen fertilizers at this stage; you want root development now, not a rush of leafy top growth.
Space determinate varieties (compact bush types that set fruit all at once) 18–24 inches apart. Indeterminate varieties (most heirlooms and many slicers that grow and produce all season) need 24–36 inches or more.
If you’re growing tomatoes in raised beds, pair them with herbs or low-growing companions in the surrounding space; it’s a good use of the in-between areas and can help with pest management.
Common Mistakes To Avoid
- Starting too early. Root-bound, overgrown plants transplant poorly. Stick to the 6–8 week window.
- Using the wrong soil. Potting mix and garden soil are too heavy for seedlings. Use seed-starting mix.
- Relying on a windowsill. Almost always insufficient light. Invest in a grow light.
- Overwatering. The most common seedling killer indoors. Let the soil dry slightly between waterings.
- Skipping hardening off. Abrupt outdoor exposure can set plants back by two weeks or more.
- Transplanting into cold soil. Soil temperature matters as much as air temperature. Wait for consistently warm nights.
- Burying the stem too shallow. Tomatoes root from their stems, so deep planting means a stronger plant. Take advantage of it every time you transplant.
Your First Seed-Started Harvest Won’t Be Your Last
There’s a noticeable difference between a tomato from a store-bought transplant and one grown from a seed you chose and started yourself. You’ll note a difference in flavor, in variety, and in how satisfying the harvest feels.
The setup is simple, the investment is low, and once you’ve eaten a Sungold cherry tomato still warm from the vine or sliced into a Brandywine you watched grow from a seedling under a shop light in February, you’ll be planning next year’s varieties before the current season is even over.
Start with one tray, two or three varieties, and a basic grow light setup. That’s genuinely all you need to get started.