
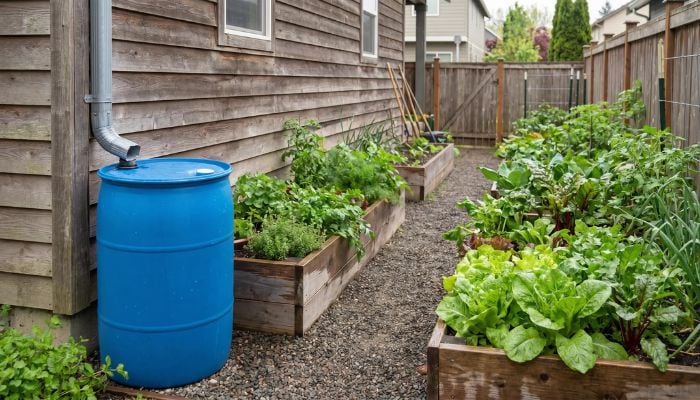
Rainwater harvesting for your garden is one of the easiest ways to make your backyard more resilient.
Instead of watching a good rain run off the roof and disappear into the yard, you can store part of it in a barrel and use it later for raised beds, containers, fruit bushes, herbs, and thirsty landscape plants.
A rain barrel won’t replace every hose session, especially during a long drought, but it can take real pressure off your water bill and give plants a chlorine-free water source they generally like.
The key is setting it up correctly from the start so it’s stable, screened, easy to use, and safe around edible crops.
This guide walks through the practical basics: choosing a barrel, checking local rules, connecting it to a downspout, managing overflow, using the water safely, and winterizing the system before freezing weather arrives.
Is Rainwater Collection Legal?
In most of the United States, collecting rainwater for home garden use is legal, and many states actively encourage it as a conservation practice.
There is no federal law that bans residential rainwater collection, but state and local rules can vary.
The most important thing to know is that restrictions are usually about scale, water rights, plumbing connections, or potable use.
A simple rain barrel used to water plants is very different from a large cistern tied into a household water system.
Western states with older water-rights laws may have more specific rules, and cities or HOAs may have their own requirements for placement, appearance, mosquito control, or overflow.
Before installing a system, check your state extension office, local water authority, city code, or HOA guidelines.
This is especially important if you plan to connect multiple barrels, store large amounts of water, or use collected rainwater for anything beyond outdoor irrigation.
Do not assume the law is the same everywhere.
- Many states allow rain barrels with no meaningful restrictions for home gardeners.
- Some states encourage them with rebates, tax incentives, or conservation programs.
- Others allow collection but limit container size, require covered storage, or regulate how the water can be used.
If you’re unsure, search for your state name plus “rainwater harvesting rules” and confirm with an official source before buying equipment.
Why Rainwater Works Well for Gardens
Rainwater is naturally soft, usually low in dissolved minerals, and free from the chlorine or chloramine used in many municipal water systems. For most outdoor plants, that makes it a gentle irrigation source.
It’s especially useful for container gardens and raised beds, which dry out faster than in-ground beds. It can also help with acid-loving plants such as blueberries, which prefer soil conditions that are carefully managed.
Rainwater alone will not fix soil pH, but it’s often a better choice than hard tap water if your irrigation water is gradually pushing the soil in the wrong direction.
The biggest benefit, though, is timing. A barrel lets you save water when it’s abundant and use it when the garden actually needs it.
Even a modest 50-gallon barrel can carry you through several rounds of hand-watering seedlings, patio containers, or a few young shrubs.
Rainwater Harvesting for Your Garden: What You Need
A basic DIY rain barrel system doesn’t have to be complicated. Most home gardeners only need a barrel, a downspout connection, a secure base, a spigot, a screen, and a way to handle overflow.
For a simple setup, gather:
- A 50- to 65-gallon rain barrel or food-grade barrel
- A downspout diverter kit or flexible downspout extension
- A stable base made from concrete blocks, pavers, or a purpose-built stand
- A spigot near the bottom of the barrel
- A debris screen or sealed lid with screened intake
- An overflow hose or overflow outlet
- A garden hose or watering can
- Basic tools such as a drill, level, tape measure, and utility knife
The barrel should be opaque or dark enough to limit algae growth. It should also have a tight-fitting lid or screened opening so leaves, insects, and animals cannot get inside.
Never use a barrel that previously held chemicals, pesticides, petroleum products, or unknown industrial materials.
Choosing the Right Rain Barrel
You can buy a finished rain barrel or build one from a repurposed food-grade container. Both can work well if they’re sturdy, covered, and designed for outdoor use.
Commercial Rain Barrels
Commercial barrels are the easiest option. They usually come with a lid, screened intake, overflow port, spigot, and sometimes a flat back that sits neatly against the house. Some also include a planter top or decorative finish.
They cost more than a DIY barrel, but the convenience is worth it for many gardeners. If you want a clean setup with fewer parts to modify, buy a barrel made specifically for rainwater collection.
Repurposed Food-Grade Barrels
A food-grade plastic barrel can be a good budget option if you’re comfortable drilling holes and installing fittings. Look for barrels that previously held food products such as juice concentrate, vinegar, or pickles.
Clean the barrel thoroughly before use, even if it just held food. Avoid any container with strong lingering odors, unknown residue, cracks, or thin, brittle plastic. The lid must be secure, and any intake opening should be screened.
DIY Rain Barrel Kits
DIY kits usually include a spigot, bulkhead fittings, gaskets, overflow parts, and a downspout diverter. They are useful if you already have a safe barrel but need the hardware to make it work.
This option gives you more control over spigot height, overflow placement, and barrel location. Take your time measuring before drilling. A hole that’s slightly too large can turn into a persistent leak.
Where To Place Your Rain Barrel
Put the barrel under a downspout that drains a usable roof area and sits close to the garden you want to water. The shorter the walk from barrel to plants, the more likely you are to use it.
The barrel needs a flat, stable base. A full 55-gallon barrel can weigh more than 450 pounds, so don’t set it directly on soft soil, mulch, or an uneven slope. Use compacted gravel topped with pavers, concrete blocks, or a sturdy stand rated for the weight.
Raising the barrel 12 to 24 inches makes it easier to fit a watering can under the spigot and improves gravity flow through a short hose.
Keep it low enough, though, that it cannot tip. If children play nearby, consider strapping the barrel to a wall or fence post for extra stability.
Avoid collecting water from roofs treated with moss killers, harsh chemicals, or fresh asphalt-based coatings.
If your roof is made from older materials, copper, treated wood shingles, or anything you’re unsure about, use the water only on ornamental plants until you can confirm it is safe.
How To Install a Downspout Diverter
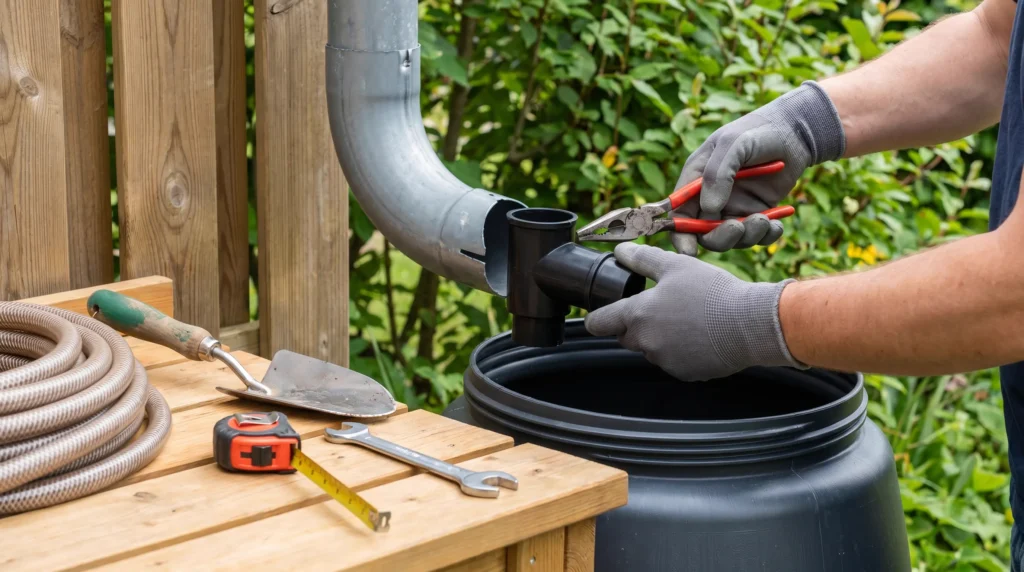
A downspout diverter is usually the cleanest way to fill a rain barrel. It directs some water into the barrel during rain and sends extra water back down the downspout once the barrel is full.
Start by placing the barrel on its finished base. Mark the height where the diverter tube will enter the barrel, and then mark the matching point on the downspout according to the kit instructions.
Most kits require cutting or drilling into the downspout and installing a diverter insert.
Follow the manufacturer’s measurements closely. If the diverter sits too high or too low, water may not flow correctly.
The barrel intake should be level with, or slightly below, the diverter outlet so water can move into the barrel without backing up.
After installing the diverter, attach the fill hose, secure all fittings, and run water from a hose into the gutter or downspout area to test the flow.
Check for leaks around the barrel fitting, spigot, and diverter. It’s much easier to fix small problems on a dry afternoon than during the first heavy storm.
If you skip the diverter and run a downspout directly into the barrel, you must have a reliable overflow plan. Roofs shed a surprising amount of water, and a barrel can fill quickly in a single storm.
Plan Overflow Before the First Storm
Managing overflow is not optional. Once the barrel is full, excess water needs somewhere safe to go.
The easiest option is an overflow hose that sends water away from the foundation and toward a lawn, rain garden, mulched tree area, or drainage path. Keep the outlet where it won’t erode soil, flood a walkway, or dump water against the house.
If you connect multiple barrels, install them on the same stable base and use proper linking fittings. Do not rely on loose hoses draped between barrels. Water is heavy, and a shifting barrel can pull fittings apart.
A good overflow setup protects your house first and your garden second. If you have to choose, route extra water away from the foundation, even if that means sending it to the lawn instead of a bed.
Using Collected Rainwater Safely on Edible Plants
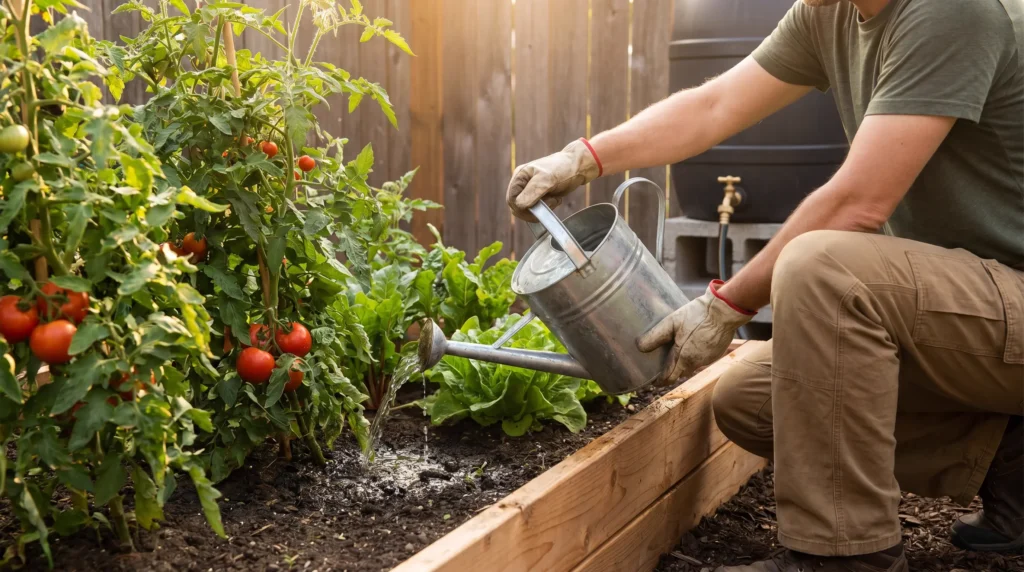
Collected rainwater is best used for outdoor irrigation, not drinking, cooking, or washing produce. Roof runoff can pick up dust, pollen, bird droppings, shingle particles, and other contaminants before it reaches the barrel.
For edible gardens, the safest approach is to water the soil, not the edible parts of the plant. Use a watering can, short hose, or drip line to apply water at the base of tomatoes, peppers, beans, herbs, berry bushes, and fruit trees.
Avoid spraying rain barrel water directly onto lettuce, spinach, strawberries, or anything you plan to eat raw.
If you’re watering leafy greens or low-growing edibles, use municipal water for the final rinse before harvest.
Also, avoid using collected roof runoff on seedlings or edible crops if your roof has been recently treated, cleaned with chemicals, or exposed to wildfire ash, heavy pollution, or pest-control products.
Mosquito, Algae, and Maintenance Tips
A rain barrel should be closed, screened, and checked regularly. If mosquitoes can reach standing water, they can breed in it.
Use a fine mesh screen over every opening, keep the lid tight, and repair gaps quickly.
If mosquitoes still become a problem, use a mosquito dunk labeled for water gardens or rain barrels. These products typically use Bacillus thuringiensis israelensis, often called Bti, which targets mosquito larvae.
To reduce algae, use an opaque barrel, keep it shaded when possible, and don’t let leaves build up inside. Clean the screen after storms, rinse sediment from the barrel a few times each season, and check that the spigot still drains freely.
If the water smells foul, looks oily, or has unusual debris, don’t use it on edible crops. Drain the barrel away from the garden, clean it, and inspect the roof, gutter, and intake screen before refilling.
How Much Water Can a Rain Barrel Collect?
A small roof area can fill a barrel faster than most people expect. One inch of rain on 100 square feet of roof can produce roughly 62 gallons of runoff before losses.
That means a standard 50-gallon barrel may fill from a modest storm if it’s connected to a productive downspout.
This is why overflow planning matters. It also explains why one barrel may not store enough water for a large vegetable garden.
A 50-gallon barrel is great for hand-watering containers, herbs, seedlings, and small beds, but a full garden during hot weather can use far more.
If you want more capacity, add a second barrel only after the first one is working well. Make sure both barrels are level, supported, screened, and connected with fittings designed for water storage.
Winterizing Your Rain Barrel
In freezing climates, winterizing prevents cracked barrels, broken spigots, and damaged downspouts. Water expands as it freezes, and a full or partly full barrel can split when temperatures drop.
Before hard freezes arrive, drain the barrel completely. Disconnect the diverter, or switch it to winter mode if the kit allows.
Reattach the downspout so roof water flows safely away from the house. Remove hoses, open the spigot, and store small parts where they will not freeze or get lost.
If possible, turn the barrel upside down or store it in a shed or garage. If it must stay outside, leave it empty with the spigot open and the lid secured so it doesn’t collect water through winter.
Rain Barrel Setup Mistakes To Avoid
Most rain barrel problems come from rushing the installation. A simple setup works best when every part has a job.
Avoid these common mistakes:
- Setting the barrel on uneven soil or mulch.
- Forgetting that a full barrel weighs several hundred pounds.
- Leaving the top open without a mosquito screen.
- Letting overflow drain against the foundation.
- Using a barrel that held chemicals or unknown materials.
- Spraying untreated roof runoff directly onto leafy greens.
- Assuming rainwater collection rules are identical in every state.
- Leaving the barrel full through freezing weather.
If you handle stability, screening, overflow, and winter storage, the system becomes much easier to maintain.
A Simple Barrel Can Change How You Water
A rain barrel is not a complicated piece of equipment, but it changes the way you think about water in the garden.
You start noticing which downspouts run hardest, which beds dry out first, and which plants are worth saving a few gallons for during a hot spell.
Start with one barrel in a convenient spot, and learn from a season of use. You may decide that one is plenty, or you may add more storage later for blueberries, raised beds, young trees, or summer containers.
Either way, the goal is the same: catch what your roof already gives you, store it safely, and put it back into the soil where it can do some good.
If you’re building out a more water-smart garden, rain barrels pair well with healthy soil, mulch, cover crops, and slow watering tools such as tree watering bags.
The better your soil holds moisture, the farther every saved gallon will go.