
Some gardeners opt to cold stratify their seeds by placing them in a refrigerator to simulate winter conditions. However, winter sowing removes the need for this step and enables the simultaneous growth of numerous desired plants.
We’ll explain the process, pros and cons, and which seeds to use plus provide the necessary supplies and a step-by-step guide.
What Is Winter Sowing?
Winter sowing is the practice of planting seeds outdoors in winter so they are subjected to naturally cold, dark, and moist conditions.
This exposure gives them a head start without the need to harden them off before planting, resulting in more robust and resilient seedlings.
Winter-sown seeds are planted in mini makeshift greenhouses that simulate the conditions many seed species need to enter a dormant period (before being awoken in spring, encouraging germination as nature intended).
Does Winter Sowing Work?
It may take some trial and error for first-timers, but winter sowing absolutely works!
Though it’s an age-old practice, winter sowing has only recently been embraced by mainstream gardeners thanks to Trudi Davidoff.
Davidoff coined the term “winter sowing” and shared her successful experience here, prompting the USDA to recognize the viability of the technique soon after.
The Reason Behind Winter Sowing
The intention behind winter sowing is to replicate Mother Nature since most seeds prefer to sprout underground and await the natural change in temperature to trigger germination (their growth can be stunted if they’re exposed to light before their time).
Also, certain seeds have tough outer shells that require softening via freezing and thawing, enabling them to sprout easily from their seed coating.
Advantages of Winter Sowing
- There is no “hardening off” period to acclimatize them to the outdoors as you would with starting seeds indoors – you have already made them cold hardy, so seedlings are ready to plant after your last local frost date!
- You can start planting your seeds much earlier than usual, enjoying a flower-filled garden for longer or an early fruit/veg/herb harvest.
- Containers keep seeds protected from birds/rodents.
- No special/expensive equipment is needed.
- It saves indoor space in your kitchen, garage, greenhouse, etc.
- Allows you to keep gardening throughout winter!
Potential Problems When Winter Sowing
- Forgetting to remove the lids on your containers once outdoor temperatures are above freezing at night, causing your seedlings to cook.
- Forgetting to water the seeds throughout winter to keep the soil moist.
- Facing a sudden cold snap once the seedlings emerge, which may affect growth rates.
- Forgetting to keep the seed containers in the shade until spring arrives, triggering premature germination.
- Using a labeling method that fades/disappears over time. Standard marker pens can fade, leaving you clueless as to what is growing in which container! Joe and Tara of Grow It Build It recommend these wax pencils as they “hold up better to UV radiation and won’t fade throughout the growing season.”
Containers To Use for Winter Sowing
The most popular containers used in winter sowing are plastic 1-gallon milk jugs or large black plastic seed trays with dome lids.
However, you can also use 2-liter plastic bottles, plastic take-out containers, ice cream buckets, or any large container with a clear lid that will hold at least 3-4 inches of soil.
The emphasis here is plastic containers with deep bottoms and clear/transparent tops to let sunlight through.
A decent amount of headroom for the seedlings to grow is also vital, which is why milk jugs are often the ideal choice.
Bear in mind that with low-depth plastic seed trays/pots, the lower soil volume will mean the seedlings dry out faster, so you’ll need to water it more often to keep it moist.
Which Seeds To Use With Container Winter Sowing
Plants with very fine or expensive seeds are ideal for container winter sowing as are any slow-growing perennials, warm-season veggies like tomatoes and peppers and warm-season annuals such as begonias and geraniums.
No Transplant Winter Sowing
No transplant or direct winter sowing involves planting your seeds in much larger, deeper containers (5-gallon tubs/buckets).
This way, the seedlings are already in their final home when they have developed and are given ample depth/width to spread their roots, eliminating the need for transplanting.
Sheryl Mann of Juicing Gardener demonstrates how she gets free seedlings in spring using 5-gallon buckets with cloche lids below.
Another No Transplant method can involve essentially foregoing the bottom half of your container and directly sowing the seeds into areas of your garden/raised bed with the top half of the container placed on top, ensuring completely unhindered growth for taproots and deep/extensive root systems.
Which Seeds To Use With In-Ground Winter Sowing
Using this technique, Sheryl Mann and other gardeners have found great success sowing various flowers, herbs, and vegetables, including (but not limited to):
- Larkspur
- Sweet William
- Celery
- Basil
- Long carrots
- Bunching onions
- Romaine, Red Flame, and Bibb lettuce
- Italian Giant spinach
- Basil lime
- Parsley
- Dill
- Upland cress
Winter Sowing Seed List
Generally, any plant that is cold hardy to your USDA region/Grow Zone should have no problems surviving the winter, so this leaves you with a wide range of seeds to choose from depending on your area.
Regardless, the following seeds are a good choice for first-time winter sowing:
- Beets
- Broccoli
- Cabbage
- Kale
- Collard greens
- Radish
- Bok choy
- Leek
- Swiss chard
- Spinach
- Chamomile
- Chives
- Mint
- Sage
- Oregano
- Lavender
- Cosmos
- Petunia
- Alyssum
- Foxgloves
- Hollyhocks
Seeds To Avoid When Winter Sowing
Tender and tropical plant seeds are not recommended for winter sowing.
“A good rule of thumb to be confident that the seeds are suited to winter sowing,” advises long-time gardening author/presenter Joe Lamp’l, “is if you spot one of the following key terms on your seed packet/info: ‘self-sowing’; ‘’direct-sowing’; ‘sown when cool’; ‘pre-chill’; ‘cold stratification’; ‘cold hardy’; ‘scarification’; or ‘hardy perennial’.”
Winter Sowing Annuals
Hardy annuals for winter sowing include cool-season crops like cauliflower, cabbage, broccoli, and leafy greens like kale and bok choy.
For your flower bed, some gorgeous hardy annuals to try winter sowing are bee balm, snapdragon, and delphinium.
Winter Sowing Perennials
Tough perennials that favor winter sowing include hydrangeas, hostas, black-eyed Susan, dianthus, australis, poppies, coneflowers, butterfly weed, shasta daisies, yarrow, and lily of the valley.
Winter Sowing Herbs
Many gardeners have found the following herbs to perform tremendously with winter sowing:
- Oregano
- Sage
- Dill
- Mint
- Cilantro
- Peppermint
- Mustard
- Summer savory
- Salsify
- Anise hyssop
When Should You Start Winter Sowing?
Seeds must be sown early enough to meet their specific cold stratification needs – for the majority of plants this is somewhere between 30 and 60 days, but some species may require longer periods.
There is no strict sowing schedule to meet other than waiting until it is consistently freezing outside.
Many gardeners start winter sowing between late December and early January (usually after Winter Solstice has officially begun), but for milder winter climates, this could be later.
For example, gardener Jessica Knowles of The 104 Homestead lives in Maine (Zone 5b) and begins winter sowing hardy annuals and perennials in January, herbs in February, and veggies, such as peppers and tomatoes, no later than early April.
When To Water Winter Sown Seeds
Initially, the seeds are sprinkled onto moist soil in your chosen containers at the start of the winter-sowing process.
Once the seeds have begun germinating, it’s a good idea to check on them to make sure the soil medium isn’t drying out and generously mist them as necessary.
Due to the greenhouse-like conditions of the containers trapping in moisture, many gardeners find that watering 2-3 times is all your seedlings need throughout the entire process – rainfall takes care of the rest!
(Just be sure to cover the containers during excessive, heavy periods.)
A big bonus for areas that get a lot of snow during winter is that the melting snow will hydrate your seedlings for you!
How To Winter Sow Seeds
Now that you know a little more about how winter sowing works and which seeds work best, let’s put it all into practice! Here’s how to winter sow your seeds step-by-step:
Supplies Needed:
- Clear/translucent (not opaque) milk jugs or plastic seed trays with domes/lids and seed starter pots
- Basic or organic potting soil (not seed-starter mix)
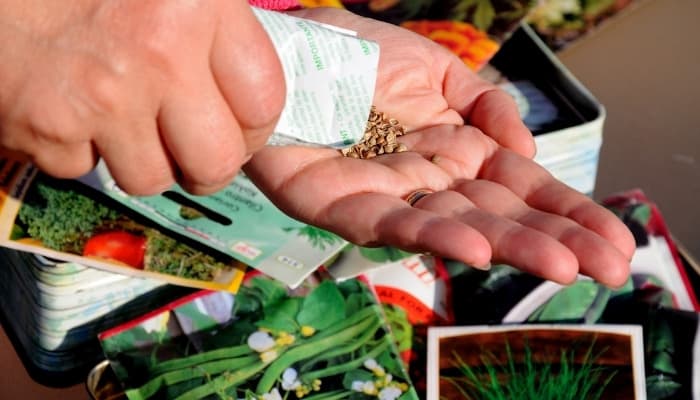
- Seeds
- Scissors/sharp knife
- Plant tags/stickers or permanent marker pencils
- Duct tape
- Watering can/sprayer
1. Clean Your Chosen Plastic Winter Sowing Containers
Clean your chosen container thoroughly using warm soapy water and a clean cloth, rinsing to remove any residue.
Dry the insides well with paper towel/clean tea towel, and set them aside to dry fully on a draining board. Discard milk jug/bottle lids.
2. Poke Holes in the Tops & Bottoms of Containers Using a Knife
Taking a sharp knife, carefully make holes in the base of your seed tray or milk jug by inserting and twisting to create holes measuring roughly 3-6 millimeters.
In seed trays, there are usually indentations guiding you where to make drainage holes, and the dome lid should already have ventilation holes to allow in rain/air.
For milk jugs, make about 5-6 evenly distributed holes in the bottom (in the center and at the corners so the water can drain on flat ground).
Ventilation holes won’t be necessary in the tops since the jug lid remains off.
3. Cut Tall Containers in Half, Creating a Flip-Lid
If you are using tall, narrow containers like milk jugs/2-liter bottles, cut them almost in half using a sharp knife or pair of scissors.
Cut right in the middle so the handle remains attached. This creates a hinge/flip-top lid that will make it easier to retrieve the seedling in spring.
4. Fill Containers With 3-4 Inches of Moist Potting Soil
Next, fill your chosen containers with potting soil, filling to about ½ inch below the edge of the container.
The base of the milk jug where you made your cut should be deep enough to hold at least 3-4 inches of soil. For plastic seed trays, fill each starter pot/cell in the same way.
Spray/mist generously with water until the potting soil is evenly moist.
5. Plant Your Seeds at the Required Depth & Label Your Containers
Now, place your seeds in the soil as per the seed packet instructions on depth/spacing, and clearly label each container with a sticker on plastic containers/individual seed pots, or write directly on milk jugs.
6. Secure the Lids to the Containers Using Tape
Wrap duct tape around the seam of your milk jug to secure it in place, or tape the dome/lid to plastic seed trays to secure it against winds.
7. Place the Containers Outside Out of Direct Sunlight Until Spring
Place your containers outdoors as long as they won’t be sitting in direct sunlight.
Once spring arrives, leave them in their containers, and remove their lids only when temperatures remain above freezing at night.
8. Transplant Seedlings Once They Develop a True Set of Leaves
Once the seedlings are tall enough and display a true set of leaves, they are ready to be transplanted in the ground or a larger container pot.
Tease out seedlings grown in seed pots by gently squeezing the base to loosen the soil.
As for seeds sown in milk jugs, take a plastic fork or a pencil, and loosen the soil in between each seedling, gently scooping each one out by hand.
If the soil is especially tough and clumpy, make careful slices with a knife like you’re cutting cake portions.
Phew, you’re done!
Conclusion
Depending on your climate and each seed’s stratification period, germination will occur at different paces, so from starting the seeds to transplanting, the whole process may take 1-2 months or more.
You’ll know you’re onto a winner when you spot a set of leaves sprouting in late winter/early spring as the weather becomes milder and your seedlings are reaching for the top of their containers!
Don’t be afraid to experiment – winter sowing is such a cost-effective method that all you risk losing is a seed packet and some soil, so there’s no harm trying a variety we haven’t mentioned. Happy sowing!