
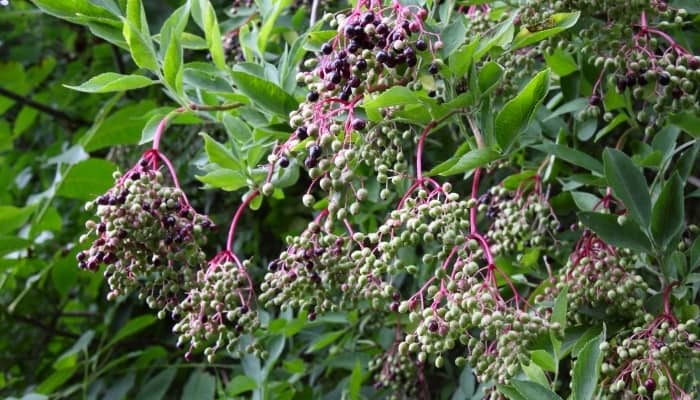
Do you have a desire to create your own elderberry jam, juice, or wine? If so, you may need to gather from various plants. However, is it feasible to grow your own elderberry plants in your garden without purchasing an entire orchard?
We’ve got you covered. Let’s check out the 6 ways you can propagate your existing parent elderberry bush or tree!
Supplies:
- Heavy-duty pruning shears
- Micro pruning shears/sharp nail scissors
- Sharp knife
- 4 & 8-inch nursery pots
- Organic potting soil
- Quart-sized Mason jar
- Seed tray
- Seed starter mix
- Bowl
- Room thermometer
- Misting bottle
- Ziploc bag
- Paper towel
- Teaspoon
Method #1 – Rooting Cuttings in Soil
1. In January-March, Take an 8-10” Cane Cutting at an Angle
In its dormant period, locate a thin but sturdy cane on the elderberry bush (roughly as thick as your little finger), and make an 8-10-inch cutting using sterile pruning shears.
Make a slanted cut if you can (at a 45° angle) so the cutting can draw up more moisture.
2. Fill 8” Pot With Moist Organic Soil & Push in Cutting 2-3”
Mist handfuls of organic potting soil with water so the mix is moist but not soggy, and fill a nursery pot with the soil (up to an inch from the rim).
Remove any lower leaves on the cane to prevent rot, and place the cutting in the soil, pushing gently into the center until the cutting is submerged about 2-3 inches.
3. Cover Pot in a Plastic Bag & Place It Out of Direct Sunlight
Make holes in a large plastic freezer bag, and place it over the pot – this acts like a mini humid greenhouse to encourage growth.
Place the bagged cutting in a cool area away from direct sunlight. A cool semi-dark basement near a window is ideal.
4. Remove the Bag Every 3 Days & Keep the Soil Moist
Take the plastic bag off the cutting for a few hours every 3 days or so, and mist the soil surface if it feels dry to keep the growing medium moist.
After about 2 weeks, the cane cutting should start to send out new leaves. After 6-8 weeks, tug gently on the cane – if there’s resistance, the roots have established nicely!
Don’t be discouraged if they haven’t yet – it may take up to 12 weeks.
Method #2 – Rooting Cuttings in Water
1. Take an Angled 8-10” Cane Cutting & Remove Lower Leaves
As with the soil method, prune off an 8-10 inch cane cutting, and make sure the cut end is at a 45° angle for increased absorption.
Next, remove any lower leaves on the cane to prevent rot in the water.
2. Place Cutting in Clean Mason Jar & Fill Part Way with Water
Placing the cutting in the jar first before adding room temp water (between 68-70°F is ideal). Fill the jar until the cutting is submerged halfway.
3. Put Jar in Partial Sun for 6-8 Weeks, Changing Water Weekly
Place the jar in an area of indirect sunlight for 6-8 weeks (near a sunny bathroom window is great). Be sure to change the water weekly or every 5 days.
Give the cane cutting a daily spritz of water if it’s in a low-humidity environment.
4. Transfer Cutting to Pot Once Strong Roots Form
After the first month in the jar, your cutting should start to develop roots. Wait another couple of weeks to allow the roots to measure at least 3 to 4 inches.
Once established, you’re then ready to plant the cuttings in their own pot of soil mix.
Method #3 – Grow From Seed
1. Soak Ripe Berries in a Bowl of Cool Water for 24 Hours
Place a handful of fresh ripe elderberries in a bowl of cool water for about 24 hours to let the skin soften.
2. Loosen Viable Seeds From Berries & Strain/Wash Them in Sieve
Afterward, stir and gently mash the berries by hand to let the seeds loose from the flesh. There are typically 3-5 seeds per berry, and viable mature seeds are heavier and will sink to the bottom of the bowl.
Save these, and drain them in a sieve before washing them thoroughly in fresh water.
3. Place Seeds on Damp Paper Towel & Refrigerate for 6 Months
Spread the elderberry seeds evenly on a moistened paper towel and fold it up before placing it inside a sealed Ziploc food bag.
Store the bag in the fridge for 6 months to cold stratify them. (Note that previously dried or store-bought elderberry seeds will need to be soaked for 3 days before this stratification step).
4. Keep Paper Towel Moist & Check for Germination Signs
In this time, check that the paper towel has not dried out, and mist it if necessary. Watch out for any signs of the seeds sprouting. If this occurs, they must be sown in seed mix immediately.
5. Sow Seeds ½” Deep Into a Tray of Seed Starter Mix
Fill a seed starter tray with seed-starting soil mix, and sow the elderberry seeds to a depth of ½ an inch.
Cover the seeds over with a light layer of soil or finished compost, and mist the medium surface until moist.
6. Place Tray in 70-85°F & Anticipate Seedlings in 4-12 Weeks
Keep the tray in a greenhouse or warm, humid conditions in indirect sunlight, ensuring the temperature remains between 70 and 80°F.
Meanwhile, keep the soil moist, and look out for the first seedling shoots – these may appear within a month or up to 3 as elderberry has poor germination rates.
At 2 inches, the seedlings can then be transferred to individual pots before eventually being planted outdoors once they reach 6 inches tall.
Method #4 – Layering
1. Select a Long Low-Growing Branch With Leaves at the Tip
Starting before the elderberry plant flowers when the stems will be supple (around mid to late April), choose a branch growing low to the ground.
Pick one about a pencil’s width in diameter, and ensure there is a set of leaves at the branch tip.
2. Test That the Branch Can Bend & Make Contact With the Ground
Gently bend the middle portion of the branch close to the ground so that it arches in a U-shape, touching the soil, like this.
This is why it should not be attempted when the plant is flowering or dormant as the branches will be more brittle and may snap.
3. Prepare the Soil Beneath the Parent Elderberry Plant
Once you’ve estimated a spot where the arch of the branch will make contact with the ground, clear all weeds, and make sure this area is prepared with the appropriate elderberry-favored soil.
Amend the area with well-draining loamy soil, or add a couple of inches of organic matter to sandy soil types.
4. Cut Thin Slits Into the Underside of the Connecting Branch
With a sharp, sterile knife, score a few thin slits into the portion of the branch that will connect with the soil to “wound” it – this is where new roots will grow.
Remove any leaves on this middle portion of branch too.
5. Dig a Shallow Trench, Bend Branch in Place & Secure It
Use a trowel to dig a shallow trench in the soil and carefully bend the wounded branch in place so it sits below ground level.
Backfill around the trench, covering the branch middle, and secure it down by placing a large stone, brick, or similar heavy object over the layered section to trick it into setting roots.
Water the layered site well, and anticipate root growth by early fall. By the following spring, you should have a new elderberry seedling ready to be transplanted to a permanent spot!
Method #5 – Remove & Transplant Volunteer Plants
1. Identify Small Seedlings Near the Parent Plant
You should spot small shoots or “volunteer plants” growing in the vicinity of your main elderberry plant or nearby flower beds (small offshoots of 2-3 leaves about 1-2 inches tall).
2. Gently Dig Up Shoots With Teaspoon & Sever Its Roots
Place a teaspoon beneath the tiny shoot and ensure the offshoot has some roots. If it does, snip the root connecting to the parent elderberry plant using clean micro shears/sharp nail scissors.
3. Transplant Offshoot into Pot of Organic Soil Mix
Pot the offshoot into a small nursery pot (4 inches) of moist potting soil, and care for it indoors as you would with a cane cutting until it grows taller.
Method #6 – Let Nature Do It For You
If your garden is already home to a beautiful elderberry bush and you don’t fancy the effort of propagation – let the plant do its thing and spread.
Once established in the ground, these plants grow fast and dense and love spreading themselves several feet wide within the first year.
Not to mention the birds are also on hand to spread elderberry seeds!
Conclusion
Once your cuttings and seedlings have well-established roots and you can be sure the ground is free of frost, you’ll be ready to start your young elderberry plants outdoors by mid-spring.
Healthy young plants will take about two years to fruit – but it will be so worth the wait once they do!
If propagating your elderberry plants from seed, note that they can take up to 5 years to sprout if you skip the cold stratification step, so we wouldn’t advise it!
Whichever method you choose, you’ll know you’ve done it right if roots establish within a couple of months and you have promising leaf development the following season.