
According to recent research, elderberry tinctures have proven to be a successful remedy for combating the common cold and influenza.
Read on below and learn exactly how to make elderberry tincture, step-by-step:
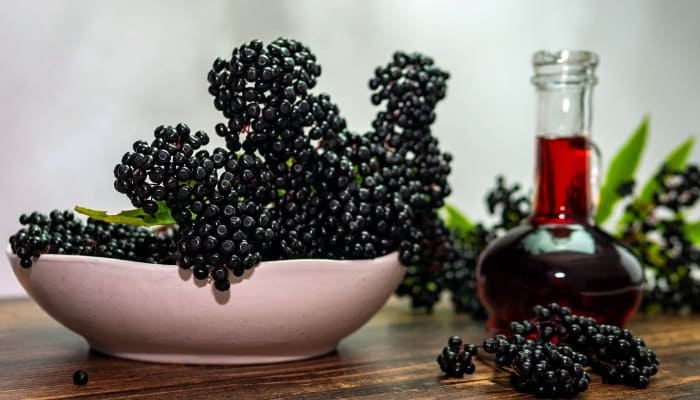
Supplies Needed
- Elderberries. Pick them or buy them fresh from the local market or in dried form online. Frozen berries can be used as well.
- Canning Jars. Wide-mouth mason jars with sealable lids and “potion” bottles with corks are the most preferred for elderberry tinctures. However, any sort of glass container with a tight lid works in a pinch.
- Vodka (or comparable alcohol). This type of alcohol is popular due to its water/alcohol composition. Similar alcohol, such as brandy, works just as well.
- Fork. Use this or a similar tool for removing the stems from your elderberries.
- A bowl and/or strainer. To hold your elderberries during the process and to rinse/wash them.
1. Pick Elderberries
Picking fresh elderberries is the first step in making elderberry tincture. Fresh berries work best, but dried berries from previous harvests are also usable.
Frozen berries may be used as well, though you typically need more berries and less water for your recipe.
Be sure to avoid the poisonous elderberry look-alike, water hemlock. Furthermore, only pick elderberries that are fully ripe and dark in full.
Unripe berries will not have the deep purple/black color of edible berries.
Snip the central stem connecting several clusters of berries while harvesting. This makes the next step even easier.
2. Remove Stems From Berries
Once you’ve collected enough berries for the amount of tincture you plan to make, it’s time to remove the stems.
Hold each berry cluster by the end of the stem you snipped, and force the berries off by bringing your fork down the cluster toward the bowl.
Continue removing the berries from the stems until your bowl is full.
3. Rinse/Wash the Berries
Once your bowl is filled with destemmed berries, transfer them to the strainer. Hold the strainer under running water in the sink, rinsing them thoroughly.
When you’ve washed all the dirt and debris off of the berries, set them to the side, and move on to the next step.
4. Fill Your Containers
Set your jars up and spoon/pour in the elderberries. Fill each jar up until there is less than an inch of room left between the top of the berries and the container’s lid.
5. Add the Alcohol to the Containers
Once you have containers filled almost to the brim with elderberries, it’s time for one of the final steps: pouring alcohol into the jars.
Cover the berries with alcohol completely, filling the containers all the way to the top (until they are almost spilling over).
After you fill the containers with berries and alcohol, cap them off with lids or corks, label them, and place them somewhere dark and dry.
6. Let Your Tinctures Age
When you are done with the first five steps, set your tincture in a pantry, cabinet, or shelf in the garage (somewhere dark and cool) for approximately 30 days.
If you want a weaker solution, let it sit for just 14 days. Stronger tinctures may be produced by letting it set for 45 to 60 days.
7. Strain and Rebottle the Final Product
Once you’ve waited the proper amount of time for the strength of tincture you are after, it’s time for the final steps.
Strain your berries from their containers over a bowl, and throw them in the garbage. Keep the liquid, and rebottle it into fresh containers with sealable lids.
Don’t forget to label your new tinctures when you’re finished.
Alcohol-Free Elderberry Tincture
Elderberry tincture can also be made of all organic ingredients, including vinegar in place of the store-bought alcohol.
Some recipes call for a mixture of vinegar and glycerin or just glycerin if you prefer.
All of the alcohol-free elderberry tinctures are just as effective as their counterparts made with vodka.
Elderberry Tincture Storage, Usage & Benefits
Now that you know how to make elderberry tincture for yourself, let’s have a look at all the other important information you need to know.
Below, we discuss proper tincture storage, shelf life, usages, benefits, and more:
Storage & Shelf Life
Elderberry tincture is good for quite some time compared to homemade syrups that go bad due to mold after less than a week out of the fridge.
Tinctures made from elderberry and alcohol can last up to a whopping five years in a cool and dry storage area (like a shelf in the garage or pantry).
Elderberry Tincture Dosage
The starting dosage of elderberry tincture is between 500 and 700 milligrams. The highest recommended dosage is 1,500 milligrams.
The recommended dosage levels vary for treating different ailments with elderberry tinctures.
Factors that determine how much you should take at one time include the strength of the solution, the severity of the issue you are treating, and your general medical state.
Elderberry Tincture Benefits
First and foremost, elderberry tincture is well known for fighting bad bacteria and boosting our immune systems in general.
That’s why tinctures have been a common homemade remedy for the cold and flu for centuries.
The second major benefit of elderberry tinctures is that it’s packed full of macro and micronutrients as well as antioxidants, including vitamins A, B, C, E, and K.
Again, this explains why these tinctures are so effective against colds.
Elderberry tinctures also have anti-inflammatory properties and plenty of phytochemicals that help your body’s insulin response. That means the tincture helps those with joint and muscle issues.
Conclusion
Making elderberry tincture is a fairly easy process; just follow the directions laid out in the steps above, and refer back to them as often as you need a reminder about the process/recipe.
Also, don’t forget to label your elderberry tinctures when they are finished (so you can keep track of how old they are)! Taking the time to store them properly ensures they last as long as possible.