
If you’re an indoor plant lover but often find it hard to keep up with watering, an automatic drip irrigation system could be a game-changer. Whether you’re short on time, have a busy schedule, or just want to make sure your plants get the right amount of water consistently, a drip irrigation system offers a hassle-free solution.
In this blog, we’ll guide you through the entire process of setting up an indoor drip irrigation system for your plants—choosing the right kit, installation steps, and tips for easy maintenance. Ready to take your plant care to the next level? Let’s dive in!
Why Your Indoor Garden Needs a Drip Irrigation System?
Before we get started, you might be wondering: Why should I switch to a drip irrigation system? Here are some key benefits:
- Water Conservation: Drip systems deliver water directly to the plant roots, which prevents water wastage and ensures efficient hydration.
- Consistency: With a timer, you can water your plants automatically, ensuring they get the right amount of water at the right time.
- Reduced Overwatering: The system ensures your plants get the perfect amount of water, reducing the risk of overwatering—a common mistake that leads to root rot.
Step 1: Choose the Right Kit
The first step is selecting the right drip irrigation kit for your indoor garden. Here are some things to consider:
- Size of Your Garden: If you have a small setup with just a few plants, a basic kit with a single drip line will suffice. For larger gardens or multiple plants in different locations, look for a more advanced kit that offers flexibility, such as adjustable drippers and longer tubing.
- Type of Plants: Consider the specific needs of your plants. Succulents and cacti need less water, while tropical plants might require more frequent watering. Some kits offer adjustable flow control to accommodate different plant types.
- Ease of Use: Look for kits that are easy to install, preferably with a simple instruction manual or even instructional videos. Some advanced kits include smart features, like Wi-Fi-enabled timers, allowing you to control watering from your phone.
Step 2: Plan Your Layout
Before you start installing, take a moment to plan out the layout. Here’s how to do it:
- Measure the Area: Measure the distance from your water source to your plants to ensure you have enough tubing.
- Position the Drippers: Decide where you want to place the emitters. For potted plants, place the drippers near the root base of each plant. For larger setups, you might need multiple drippers per plant.
- Consider the Water Flow: If you have a lot of plants, make sure your system can handle the water flow needed. You might need to install pressure regulators or splitters to ensure the right distribution.
Sketching the layout on paper (or even on your phone) can help ensure you don’t miss anything during installation.
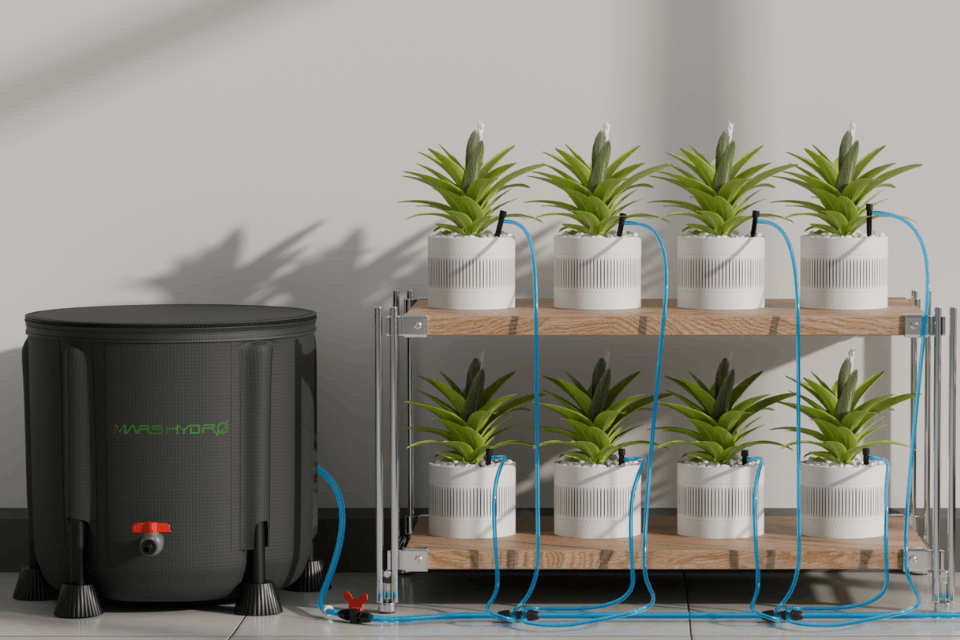
Step 3: Install the Drip Irrigation System
Now that you have everything planned, it’s time to install the system. Follow these steps:
- Connect the Tubing: Start by attaching the tubing to the water source. If your kit includes a filter, attach it first to ensure clean water flow. Then, run the tubing from the water source to your plants.
- Install the Drippers: Use the emitters provided in the kit to create small holes in the tubing, or connect them with the appropriate fittings to your plants. For potted plants, use stakes to keep the drippers in place near the roots. For larger setups, consider adjustable emitters for more control over water flow.
- Secure the Tubing: Use clamps or stakes to secure the tubing along the plants’ pots or along the edge of your indoor garden. Make sure the tubing doesn’t block any air vents or interfere with your daily activities.
- Set Up the Timer (Recommended): If your kit includes a timer, set it up to automate your watering schedule. Set the timer to water your plants according to their specific needs—this could range from daily watering for tropical plants to once or twice a week for succulents.
Step 4: Test and Adjust
Before you call the job done, test the system to ensure everything is working properly. Turn on the water, and check that the water flow is consistent across all emitters. Look for any leaks in the tubing or fittings and make adjustments as needed.
- Adjust the Emitters: If you find that some plants are getting too much water, reduce the flow by adjusting the emitter or moving it slightly. Conversely, increase the flow for plants that need more water.
- Check for Clogs: If any emitters are clogged, remove them and clean them out. Over time, minerals or debris may build up, so it’s important to clean your system regularly.
Step 6: Regular Maintenance
A well-maintained drip irrigation system can last for years. To ensure it continues to run smoothly, follow these maintenance tips:
- Check the Emitters Monthly: Ensure they’re not clogged or blocked by dust or minerals.
- Clean the Filter Regularly: If your system has a filter, clean it every couple of months to avoid buildup.
- Inspect the Tubing: Over time, tubing can degrade, especially if exposed to sunlight or heat. Check for cracks or leaks and replace damaged sections as needed.
Conclusion
Setting up a drip irrigation system for your indoor garden can save you time and help your plants thrive. With the right kit and a little setup effort, you’ll be able to automate your plant care and enjoy lush, healthy greenery without the constant worry of overwatering or forgetting to water your plants!