
Lately, growing mushrooms in one’s own home has become a trendy pastime and it’s easy to understand why.
There’s pride and satisfaction in cultivating your own fresh fungi – even more so when you attempt an unusual, rarely foraged mushroom like the elm oyster!
What is an elm oyster mushroom? Elm oysters are uncommon edible fungi with large caps that resemble oyster shells. They grow high up on the trunks and branches of elm trees. Despite the name and similar appearance, these are not true elm oyster mushrooms like the larger white elm mushroom that grows at ground level.
Don’t be deterred by its odd appearance – this mushroom is relatively easy to grow at home with the right tools and preparation and has so much to offer your dinner plate, the medical world, and even the planet.
Let’s explore the wonderful elm oyster mushroom from how to cook with it to steps on farming it for yourself and much more.
Elm Oyster Mushrooms
Elm oyster or “elm leech” mushrooms (Hypsizygus ulmarius) are found growing on the high branches of elms and other deciduous trees in the temperate forests of Europe and North America.
It is quite unlike the white elm mushroom (Pleurotus ostreatus), which grows mainly on the fallen logs and stumps of dead trees.
Elm oysters grow between summer and early winter and require temperatures between 55 and 75°F to fruit successfully.
Elm Oyster Identification & Appearance
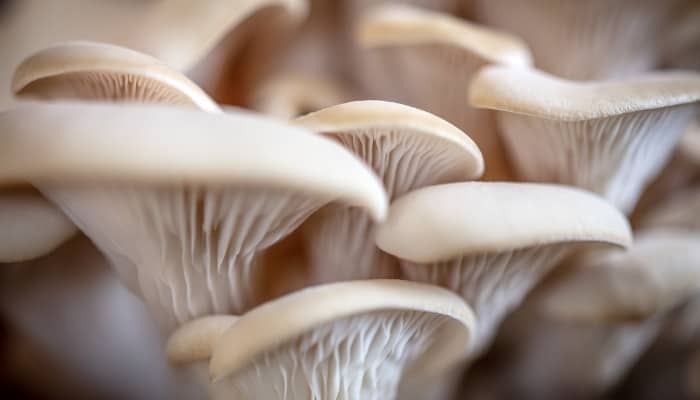
- These mushrooms are creamy white and grow alone or in clusters of three. The smooth, uniform caps – ranging between 2-12 inches wide – are mostly convex with some fanning out to resemble oysters.
- The broad white gills of elm oysters are crowded and extend slightly down the stem below the point of attachment.
- Stems are 2-6 inches long and grow perpendicular to the tree before curving vertically to form the cap.
Elm Oyster Growth Stages
1. Spore Dispersal
Adult mushrooms release spores from the basidium (a microscopic structure on the gill surface) in the hope that some will land in a moist, hospitable environment – in this case, within a wound or scar of the host tree or a nearby decaying tree.
2. Germination
Once the spores land, they sprout single cells known as hyphae. Male and female hyphae strands then mate to form new fertile growth known as mycelium.
3. Blooming/Fruiting
This mycelium grows and expands, devouring nutrients from the tree as it spreads across the surface.
Eventually, the onset of hot, humid conditions triggers the mycelium to form into tight balls or pins, which later bloom into large recognizable fruiting bodies.
Are Elm Oysters Edible?
Yes, these mushrooms are edible, but they have a tough texture and are considered a rare delicacy since they’re out of reach for many foragers!
Elm Oyster Taste
Elm oysters are said to have a mild, mealy flavor and a pleasant meaty quality when cooked.
Elm Oyster Look-Alikes
These mushrooms are often confused with true oyster mushrooms belonging to the Pleutorus genus, such as white elm (Pleurotus ostreatus) and the branched oyster mushroom (Pleurotus cornucopiae).
While it’s not always easy to differentiate between types, a good giveaway is in the details of the cap and gills.
The caps of Pleutorus oyster mushrooms grow in a flatter manner in compact stacks of multiple mushrooms with caps strongly resembling oyster shells. Often their caps have slightly scalloped edges too.
Secondly, while Hypsizygus ulmarius mushrooms fan out to an extent, they retain an incurved margin to give them a more convex typical mushroom “cap,” and their gills grow more or less closely to the top of the stem.
Branched and white elm oysters, meanwhile, have deeply decurrent gills that almost run down the entire stalk.
Elm Oyster Uses
Elm oysters are used in a wide variety of savory dishes and have also historically been utilized in China for millennia as a medicinal fungus.
More recently, the elm oyster mushroom has also demonstrated potential in cleaning up environmental pollutants.
Using the same enzyme to decompose and remove toxins from tree tissue, elm oysters may also be able to biodegrade plastics, according to research published in the international Phytochemistry journal.
Elm Oyster Benefits
- Easy, fast growers: They can be grown fairly easily at home by adding mushroom spawn to suitable medium, and you can usually see results within weeks!
- Low maintenance: Once the mushroom spawn has been incubated, they’ll need little aftercare besides keeping them misted.
- Super healthy: These are low in carbs and contain less than 1 gram of fat, making them a great addition to healthy meals.
- Rich in nutrients and antioxidants – Its antioxidant and anti-inflammatory properties are not only known to regulate blood pressure and lower cholesterol, but extracts have even demonstrated significant anti-tumor activity.
Elm Oyster Side Effects
Because elm oysters are less common compared with true oyster mushrooms, little is known about their potential risks other than possible vomiting, diarrhea, and adnominal pain when consumed in large quantities.
To be on the safe side, elm oysters should be regarded with the same caution applied to Pleurotus ostreatus.
Due to their high concentration of zinc, for example, consuming them in large quantities for extended periods can risk “copper deficiency, reducing your white blood cell count,” according to nutritionists Dr. Archna Agrawal and Sindhu Koganti.
For this reason, pregnant/breastfeeding women and those with severe allergies or weakened immune systems should avoid elm oysters.
Elm Oyster Cultivation
To grow elm oysters at home, you’ll typically need a substrate (such as grain) that has been colonized with mycelium (mushroom spawn), a substrate to grow the spawn on (such as pasteurized straw), and a plastic chamber to keep the spawn suitably humid.
It’s best to do this outdoors for space, convenience, and airflow.
You’ll need:
- Grain spawn
- 40-pound bale of wheat straw
- Large plastic tote
- 5-gallon bucket
- 20-inch Plastic poly tubing
- Large mesh laundry bag/burlap sack
- Sterile heavy-duty shears
- Table/workstation with plastic sheeting
- Latex gloves
- Face mask
1. Break up the Straw Into Finer Pieces & Pasteurize
Place your straw bale into a large tote/container, and break it up into 1-3 inch pieces using sharp garden shears (Alternatively, chop up the straw in a plastic barrel using a Weed Whacker).
Next, gather the chopped straw, and soak it in hot water for 45 minutes to 1 hour.
This can be done by placing your straw into a burlap sack/mesh laundry bag/pillowcase and submerging it in 160-170°F bath water.
(You can skip this step and buy pre-pasteurized straw, but this is quite expensive).
2. Allow the Straw To Drain & Prepare Your Working Area
Let the pasteurized straw drain for about 15-20 minutes over a large bucket/tote. Meanwhile, clean down your work station with rubbing alcohol to prevent contamination.
3. Weigh Out 20 Pounds of Straw in Tote & Mix in Grain Spawn
Empty the straw onto your work surface to let it air dry for a further 10 minutes.
Meanwhile, tie a secure knot in one end of the poly bag, and place it in the bucket to help it keep its shape as you’ll be filling it later.
Next, weigh out 20 pounds of straw, and add it to a large, clean tote. Then, empty the bag of grain spawn into the straw.
It can form clumps in the packaging, so break it up further in your hands, and mix it in thoroughly with the straw.
4. Fill Poly bag With Mixture To Form Log & Tie Off Securely
Pack the straw/spawn mixture tightly into your open poly bag, filling every corner and space of the bag you can so that it forms a compact log shape.
Press down on the top of the mix to squeeze any remaining air out before twisting the top of the poly bag and tying it off tightly, securing it in place with a cable/zip-tie.
5. Puncture Air Holes in the Bag & Place Indoors
Lastly, place some air holes into the straw log using a sterilized razor blade – this helps the mycelium breathe as it colonizes the straw and provides holes for the fruiting mushrooms to eventually emerge!
Place the bag indoors in a cool, well-aerated environment out of direct sunlight (ideally on a shelf in your shed/garage) at 55-75°F for 2-3 weeks.
Start misting the log with water daily once the first flush of mushrooms appears.
Elm Oyster Spawn
Elm oyster spawn is essentially the equivalent of mushroom seeds, but as mushrooms produce spores instead of seeds, the live mushroom culture (mycelium) is taken and propagated onto a cereal grain.
As spawn-making is a complex and delicate task, most growers buy ready-colonized elm oyster spawn.
This can then be cultivated outdoors (for those in ideal climates around 80°F with 80-90% humidity) on the logs/stumps of elm, oak, beech, and other broadleaf deciduous trees.
Commonly though, most will cultivate elm oysters indoors by mixing the spawn with wood chip substrate or most commonly with pasteurized straw.
Elm Oyster Spawn Sources
To make it simple for home growing, pre-made spawn can be found online in a form that’s ready to grow – from syringes of liquid mycelium to be injected into grain/rye berries to grow kits that have already been mixed in with the spawn for complete beginners!
How Long Do Elm Oysters Take To Grow?
When grown indoors, you’ll normally see the first signs of pinning (small mushroom heads) developing after 7 days.
After that, they typically begin doubling in size before fruiting fully as quickly as 14-21 days from spawning.
Elm oysters grown on logs can take much longer, fruiting after around 7 months on poplar logs or up to 12 months on beech.
The trade-off with growing them on logs, however, is that they’ll provide you with mushrooms for several years as opposed to a single season.
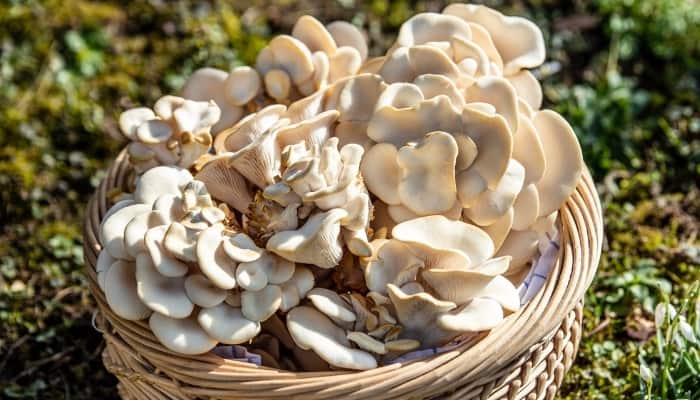
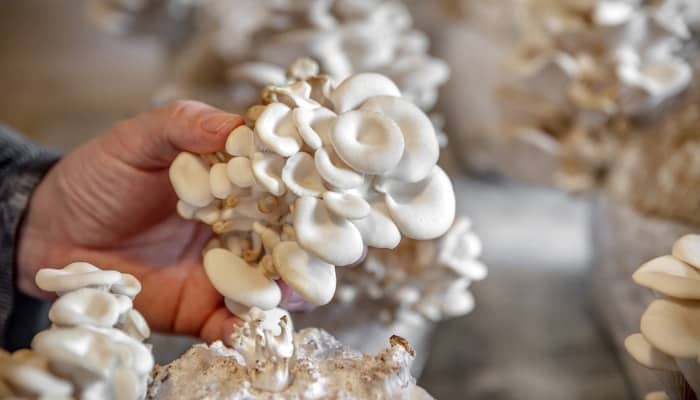
When & How To Harvest Elm Oysters
You’ll know elm oysters are ready to harvest when their convex caps begin to upturn, suggesting peak maturity.
Try not to harvest them any later than this as the flatter the cap, the tougher and blander they’ll be.
To harvest, gently twist the stem and pull them from their growing substrate, or use sharp, sterile scissors.
Remember, mushroom clusters will fruit at different stages, so leave smaller clusters with convex caps.
How To Store Elm Oysters
Elm oysters have a shelf life of around 48 hours at room temperature due to the broad caps drying out quickly, so preserve them appropriately.
Drying
Slice mushrooms into 5-millimeter-thick sections, and lay them flat on a baking tray before placing them in an oven preheated to 150°F.
Bake them for an hour, flipping them halfway through, and allow them to cool at room temperature before placing/storing them in an airtight jar or container
Freezing
Boil the mushrooms for 3 minutes before rinsing them under cold water and allowing them to drain. Then place them in Ziploc freezer bags, where they should last for up to 6 months.
You can also store fresh mushrooms in Ziploc bags in the fridge, where they’ll keep for 4-5 days.
How Do You Cook Elm Oysters?
Master Gardener at the University of Wyoming Chris Hilgert recommends using elm oysters to best effect “in cream sauces and omelets.”
(He’s also adapted a delicious hamburger recipe using oyster mushrooms here!)
Coat the mushrooms in breadcrumbs or flour to enhance their flavor, and add them to stews, soups, stir-fries, pasta dishes, and pizzas.
Common Problems When Growing Elm Oysters
Sparse Mushroom Growth
If there is no sour smell to indicate contamination in the mixture but there are hardly any mushroom clusters growing from the bag after 2 weeks, this suggests there were too many air gaps in the bag for the mycelium to latch onto.
Solution
Pack the poly bag tightly to the point of over-stuffing to keep things nicely compacted, and be sure to use a bag that will hold its shape well and not lose pieces/create air gaps. Try close-knit mesh or poly tubing.
Green/Blue Mold in Incubation Bag
Green or blue mold patches suggests that in the process, the substrate became contaminated due to unclean work surfaces/tools.
Solution
Unfortunately, mold won’t allow the mushroom spawn to fruit, so you’ll need to dispose of the substrate and start over, taking care to prevent contamination by using clean gloves, wiping down all work surfaces with rubbing alcohol/bleach, and sterilizing any tools used.
Conclusion
To sum up, the uncommon elm oyster mushroom isn’t a true oyster mushroom despite its similar appearance to fungi in the Pleurotus genus, but it’s believed to have a more pleasant taste as well as being super healthy (in small doses).
Elm oysters are fairly straightforward to grow at home using kits or adding pre-made mushroom spawn to substrate.
If spawning these mushrooms from scratch, take care to prevent contamination so you can harvest nutritious and tasty fungi every time!