
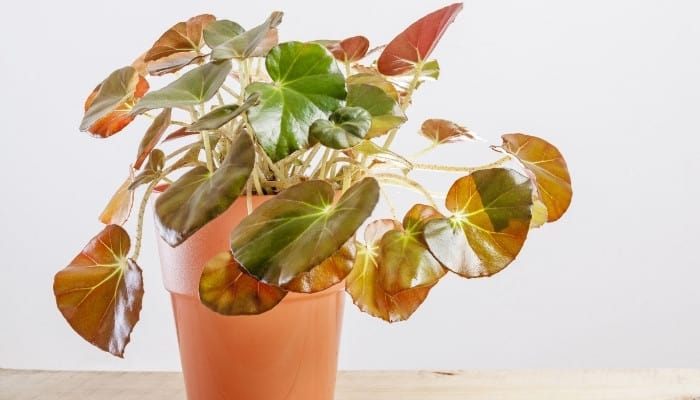
If the pot of your beefsteak begonia becomes overcrowded, it is necessary to propagate the plant. The great news is that this plant can be easily propagated. If there are difficulties in rephrasing this text, kindly respond with the error message: Unable to process the request due to encountered difficulties.
Even placing a single leaf in soil can be enough to reproduce this beauty – it’s no wonder this plant is one of the most beloved heirloom begonias!
Let’s dive step-by-step into the 4 methods of propagating your beefsteak begonia from root division and leaf snippings to establishing stem cuttings in soil or water.
Method #1 – Division
Supplies Needed:
- Rectangular seed tray with lid
- Peat-based potting mix
- Paring knife
- Blunt knife
- Rooting hormone powder
- Disposable gloves
- Wide, shallow container pot
1. Prepare a Shallow Seed Tray With ½ Inch of Soilless Peat-Based Potting Mix
Fill your seedling tray with a soilless mix of 2-parts peat moss and 1-part vermiculite or fine perlite (find it here).
This creates a loose, oxygenated medium to control moisture levels so root development isn’t hindered by waterlogged soil.
Water the tray until the entire potting medium feels evenly damp, not soggy.
2. Pull Up the Plant’s Rhizome & Prepare It for Dividing
Wearing disposable gloves, loosen the soil around the plant until you can clearly identify the long rhizome structure, the thick, scaly stem growing horizontally in the soil.
Carefully remove the plant from its current pot, laying it out on some newspaper on a flat, hard surface.
3. Take 3-4 Cuttings From the Rhizome
You’ll want to leave most of your main plant intact so it can be repotted later, so only make 3-4 cuttings of about 1½ -2 inches in length using a paring knife (sharp, stubby chef’s knife used for vegetable dicing).
Before taking your cuttings, ensure each section has a leaf scar (a lighter-colored ovular/teardrop-shaped scoring on the stem where an old leaf stalk used to be attached) or several growth buds (small swollen nodules).
Remove any leaf stems still attached to your cuttings to focus growing energy into the new rhizome sections.
4. Roll the Cuttings in Rooting Hormone & Make a Shallow Trench in the Potting Mix
Place 1 teaspoon of rooting hormone powder into a small plastic bowl or sandwich bag and place all of your rhizome cuttings in the powder, rolling each one until it is lightly coated.
This powder will help accelerate the formation of new roots. (I recently tried this rooting hormone and was very impressed!)
Next, use a blunt knife to create a shallow trench length-wise in the tray medium. Lay your cuttings horizontally and half-depressed in the mix.
Be sure to place the cuttings “smooth side down” urges Mac Holmes, owner of the Carter & Holmes Orchids plant nursery, “leaf scars or buds must be facing upwards.”
Pat the mix down around the edges of each cutting.
5. Place the Tray in Warm, Shady Conditions & Keep the Soil Moist
Replace the tray lid to increase humidity and place it in an area of indirect sunlight with temperatures of 70-75°F, watering the medium weekly to keep it moist.
If you’re successful, you should see a small leaf appear from a leaf scar or the cut ends in as little as 4 weeks, though it could take as long as 10.
Cuttings that have not sprouted new leaves within 12-15 weeks were likely kept in overly soggy soil or lower room temperatures and will usually appear shriveled and blackened, so throw these away.
After 2 months in the seedling tray, each healthy, well-rooted rhizome (displaying 1-2 inch-sized lily-pad leaves) can be planted into their own wide, shallow pot and cared for as normal.
Method #2 – Leaf Cuttings
Supplies Needed:
- Seed container/bowl with lid
- Peat-based potting mix
- Tweezers
- Sharp kitchen scissors
- Liquid fertilizer
- Wide, Shallow container pot
1. Prepare Seed Container With Soilless Medium & Choose a Young Leaf To Cut
Fill your seed container with ½ an inch of soilless potting mix with a peat-moss base as used in the division method and water it until damp, stirring your finger around in the medium to disperse the water evenly.
Next, select a newer leaf near the top of your parent begonia plant as lower, older leaves lack the required energy for propagation.
Snip the leaf off as close to the stem as possible using sharp, sterilized kitchen scissors.
2. Cut the Leaf Into Pieces & Lay Flat on the Potting Mix
Using some of the veins as “cut here” guidelines, cut the leaf into about 3-4 wedge-shaped pieces.
Succulent gardener Andrea Afra of Sucs For You! warns: “don’t make more than 4 cuttings as this left me with poor results!”
Next, lay the leaf pieces flat on the damp potting mix and press on them gently so the cut sides are in contact with the mix (if it’s not easy to press them into the medium, add a little more water).
3. Replace the Lid & Place Cuttings Indoors in Indirect Light
Place your covered seed container in indirect sunlight (on a shelf a few feet from a window is ideal). Darker homes should place grow lights nearby as a reliable indirect source.
These clip-style lights with three arms are ideal.
Remove the lid for around 20 minutes per day to ward off rot, and monitor the leaf cuttings for the next 1-2 months, watering weekly to keep the mix damp.
4. Apply Fertilizer Once Two New Leaves Develop & Transplant After 3 Months Growth
After 4 weeks, you should see signs of new leaf growth emerging from the portion of the cutting where the vein was in contact with the potting mix.
Once two leaves have developed, give them a boost with a dose of liquid fertilizer , like this one designed for blooming plants, diluted to half the strength.
After the 3 month mark, it should put out 3 or more leaves (measuring roughly 2-3 inches across) and can be transplanted into its own pot.
Unhealthy growth (usually from soggy soil) can result in a white mossy fungus forming, and the whole medium should be discarded in this case.
Should you have slow/poor results using the above-mentioned method, cut another leaf into segments, but this time place the pieces vertically in the medium with the center point (where the veins meet) facing downward.
Use tweezers to pick up and press the leaf cuttings into the mix.
Method #3 – Stem Cuttings in Water
Supplies Needed:
- Pruning shears
- Distilled water
- Rooting hormone powder
- Clear glass jar or vase
1. Cut 4-6 inch Mature Stem Sections at a 45° Angle Just Below a Leaf Node
Using clean pruning shears, take a 4-6 inch length of stem with a top leaf attached.
Make your selection from a mature stem for quicker results (though take care not to choose stems so old that they feel tough and woody as these will be unsuccessful).
Also, cut at a 45° angle for increased water uptake, and cut just below a leaf node as this nodule will produce the roots.
2. Dip Cutting End in Rooting Hormone & Partially Submerge the Stem in Distilled Water
First, remove any lower leaves on the stem and brush off any debris to ensure it’s smooth as lingering decay could promote rot during the process.
Next, place the cutting end into rooting powder for a few seconds and shake off excess (dip the cutting end in water first if the powder won’t stick).
You’re now ready to place your stem cutting into a vase or jar of water. Fill your chosen container 2/3 of the way with distilled water to sidestep the growth-hindering contaminants in straight tap water.
3. Place Stem Cutting in a Warm Spot of Filtered Sunlight
Keep the vase in a room of at least 65°F in filtered sunlight – on a windowsill with a cloth shade is ideal or a few feet from a south-facing window.
Aim to change the water every 5-7 days to prevent algae growth, and expect to see roots forming in a month or less.
4. Transplant Stem Cuttings Once Roots Measure 2 inches Long
Established stem cuttings can be planted into individual pots of moist soil medium once the roots measure at least 2 inches.
Check that the roots are pale and not darkly colored or mushy as the latter suggests rot after sitting in the same water for too long.
If your cutting has failed to develop roots altogether after a month, review your lighting conditions – cuttings need bright indirect sunlight, not full shade or sun.
Method #4 – Stem Cuttings in Soil
Supplies Needed:
- Small 4-5 inch plastic pot
- Pruning shears
- Pencil/dowel stick
- Humidifier/humidity tray
1. Prepare a 4-5 inch Container With Moist, Well-Draining Potting Mix
Take a small plastic plant pot with drainage holes and fill it about halfway with a potting medium of 1-part peat moss and 1-part perlite
The lightweight granular perlite promotes soil aeration which is crucial for warding off rot as the roots develop.
Water the medium until it’s moist and make a hole in the center of the mix using a pencil.
2. Cut a 5-7 inch Stem Section Below a Leaf Node & Remove Any Lower Leaves
Using clean pruning shears, take a 5-7 inch long stem cutting at a 45° angle, and as before cut below a leaf node.
Be sure to remove any lower leaves on the stem cutting to prevent submerging leaves in the soil, which could contribute to basal stem rot and fungus.
3. Place Cutting In Prepared Pot & Place in Warm, Humid Environment for 3-4 Weeks
Carefully plant your stem cutting roughly 4 inches deep into the potting medium, and add the remainder of the mix, patting down lightly around the stem to ensure it remains upright.
Next place the pot in an area that can maintain comfortable room temperatures (68-72°F) and at least 70% humidity, and water regularly so the soil remains moist, not soggy.
Maintain its ideal climate by steering clear of drafts or overhead AC units (sun rooms and bathrooms can be ideal locations while the cutting takes root).
Jackie Rhoades at Gardening Know How recommends “covering the pot in a clear plastic bag for the first week to increase initial humidity.”
You can then maintain levels with the help of a humidifier or by setting up a pebble tray.
4. Expect Roots to Develop After 1 Month & New Shoots to Appear Within 50-70 Days
Within 50-70 days, your established stem cutting can be transplanted into a larger container.
During this time, it’s normal for the top leaves on the stem to appear slightly limp while the stem redirects its attention to root development.
You’ll know it has rooted successfully when you tug gently at the stem base and feel resistance.
New leaf growth is a further sign of success, but if no new leaves appear after 2 months, check the roots for signs of rot that could be causing the stunted development.
Healthy roots should appear pale and feel firm to touch whereas rotten roots will be dark and feel mushy.
Conclusion
To sum up, propagating your beefsteak begonia may take as little as 3 weeks or 3 months depending on the method used and how closely you maintain each cutting’s ideal environment.
You’ll know you’re onto a winner when it only takes a matter of weeks for the first new leaf shoots and roots to emerge.
When attempted correctly, roots should be pale and measure a couple of inches and new leaf shoots should appear as small and rounded green or burgundy leaves, resembling perfect replicas of their parent beefsteak without any shriveling, blackening, or white fungus in sight.
Sources:
https://houseplantcentral.com/propagating-begonia/
https://thegardenfrog.me/beefsteak-begonia-in-the-home-and-garden/
https://www.violetbarn.com/plant_care/lessons/propagating-begonias-by-leaf/
https://www.gardeningknowhow.com/ornamental/flowers/begonia/begonia-propagation.htm